Creating Sites
You can create a site for each output that you want to associate with certain settings and characteristics, such as making a site "live" and/or "private."
[Menu Proxy — Headings — Online — Depth3 ]
Permission Required?
For this activity, you must have the following permission setting:

For more information about permissions, see Setting User Permissions or Setting Team Permissions.
How to Create a Site
- Do the following:
- Make sure you are associated with the project for which you want to set up a site destination.
- Make sure you have synchronized (pushed) the latest changes from Flare to Central, and if you are using branching, ensure the changes for that particular branch are synchronized with Central.
- You also might want to make sure the relevant target has at least one build successfully generated for it. Otherwise, you can tell Central to just use the latest build when you get to that option later in the dialog.
- On the left side of the interface, click Sites.
- With the Sites tab selected at the top, click
 .
. - On the Settings tab of the dialog, complete the appropriate fields.
Name Give the site a name so that you easily recognize the output to which it points.
Example You might decide to name each site after a combination of the project and target names. If your project is called "Module 1" and the target is called "HTML5," you could name the site "Module 1 - HTML5."
Note Keep in mind that the avatar automatically generated for the site will display the first three characters of the site's name.
- Domain Select a domain (i.e., URL), which you create and manage in the URLs page view
Vanity (Optional) You can set a vanity for the output to produce a more meaningful URL that is easier to recognize when the site is live. This is also useful if you have multiple versions of a target's output and want to have a different URL for each version. If you do not provide a vanity here, an auto-generated ID will be used. See Setting Site Vanities.
Note Only alphanumeric characters, periods, underscores, and hyphens are allowed.
- Site Theme (Optional) Select a theme to use when displaying various interface elements (e.g., login fields, 404 pages) to end users
- Site Trusted Domain Group (Optional) Select a group containing domains that you want to allow in your output
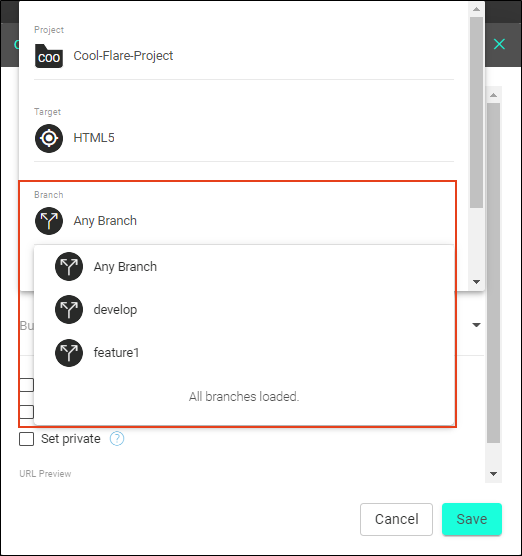
Build Select a destination (i.e., output) for the site.
From the Project field, select a project.
From the Target field, select a target.
From the Branch field, select a branch. You can also select "Any Branch" if you want the final field to list builds from all branches in the project.

From the Build field, select a build. You can select a specific build (based on the build's ID, completion date, and time), or you can select Latest Build (i.e., the most recent successful build will be used automatically).
Warning If you are setting the site as "live" for the general public, we recommend you select a specific build. Otherwise, if you tell Central to use the latest build, you might end up with live output that is not yet ready for publication but happens to be the most recent build for the target. However, if the output is also set as "private" and intended only for individuals in your company, you might find it beneficial to choose the latest build. Just give it some thought when making a selection in this field.
Tip If this is a site where the build might be updated over time, it is a good idea to set the previously live build to "keep," just in case you need to roll back to it at some point.
- Set live (Optional) You can set a site (i.e., destination output) as "live," which means it is published and therefore immediately be viewable by the public (or to certain individuals only if you make the site private).
Include in search engines (Optional) For each site that you set to “live” (but not "private"), you have the option to prevent the output from being used by search engines. You might consider doing this if you have multiple versions of product documentation, but you only want the most recent version to show up in search results. See Excluding Live Sites From Search Engines.
Note When you enable this option, the server adds the site URL to a robots.txt file, which is generated by the server. This robots.txt file specifies that searches for content in that URL should be disallowed.
- Set private (Optional) You can set HTML5 outputs as "private." Users must log in to view the output, which means they must be part of your license as authors, SMEs, or viewers. See Setting Sites as Private.
- Click Save.
What’s Next?
You also might want to associate the new site with a team. The primary reason for doing this is to make private output available to users. A user must be on a team that is associated with a private site in order to view the output. See Associating Sites With Teams.
If the animation below is cut off, you can see the complete animation by clicking the link under it to open the full topic.