Main Navigation Framework
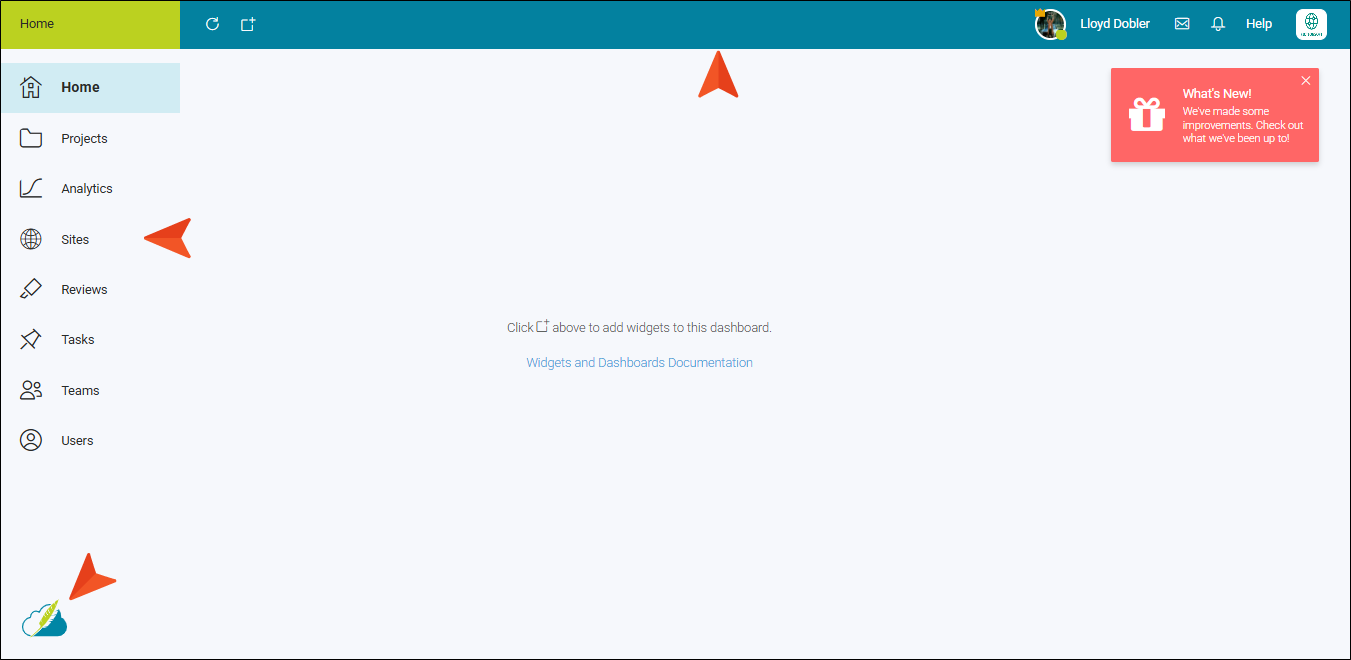
The main navigation framework in Flare Online is the top and left navigation area of the workspace. The options remain accessible as you open any of the various pages in the Flare Online license, and some of the options in the top bar dynamically change, depending on the page you open. Also, the Flare Online logo on the lower-left opens the About box, which shows version and copyright information about Flare Online.
Note If you are logged in with the author user type, you will see the entire user interface. If you are logged in as a subject matter expert (SME), you will only see the Reviews page and limited other parts of the interface.
[Menu Proxy — Headings — Online — Depth3 ]
Top Navigation
|
Shows your avatar. If you do not have an avatar set, your initials will be shown. If you are a user administrator, you will see a crown on your avatar. Also, a colored circle indicates a user's status: User Status
User ProfileClicking your name/avatar at the top of Flare Online opens your profile, which you can edit from selections on the left (e.g., enter contact information, change password, assign teams and projects, set permissions and notifications). It's the same dialog that you can open for yourself and other users by clicking the user avatar or name in various places in the interface. See Setting Your Profile and Notifications. |
|
|
Lets you open the Message Center, which is a conversation platform for all users on the license (see Message Center). Alerts for new messages are indicated by a green dot. After you open your messages and then close the Message Center, the alert will be removed from the icon. |
|
|
Lets you see recent notifications. Alerts for new notifications are indicated by a red dot. See Setting Your Profile and Notifications. After you click the icon, the alert will be removed from the icon. |
|
|
After clicking this, you can choose the following:
|
|
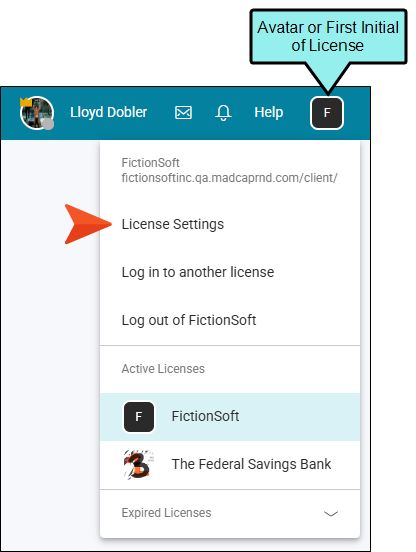
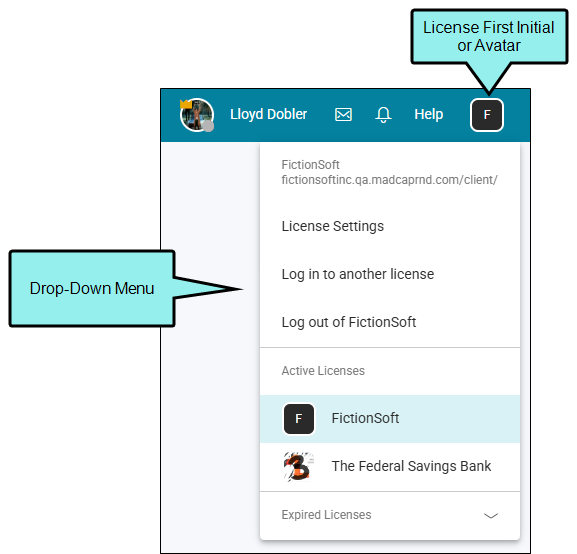
License Menu
The icon in the upper-right of Flare Online displays the avatar for your license key, or it displays the first initial if you have not yet set an avatar. All of the information you see throughout the interface is tied to this license. Clicking this displays a drop-down where you can choose various options to open license settings, switch to a different license (if you have more than one), or log out. License SettingsThe License Settings option lets you perform tasks such as changing the license key label, setting up Slack integration, integrating with AI Assist (ChatGPT) or single sign-on, and choosing security settings. Also, some users are allowed to buy more user seats and purchase additional storage space. See License Management and Purchasing.
|

 Online
 Away (when the user is inactive for some time)
 Offline


Left Navigation
|
Opens the Home page dashboard, where you can add widgets pointing to various information in the system. See Dashboards and Widgets. |
|
|
Opens the Projects page, where you can create projects directly in Flare Online or manage uploaded projects and output. See Projects. |
|
|
Opens the Analytics page, where you can view analytics on published HTML5 output. This includes search phrases used, search phrases with no results, topics viewed, context-sensitive Help calls, and demographic statistics (browsers and operating systems). See Analytics. |
|
|
Opens the Sites page, where you can manage and view sites on the license. A site is a collection of information about an output and its destination. In other words, after you generate output, you want to make it available to your customers. That's what sites are all about. Four page views are available: Sites, URLs, Security, Themes. See Sites. |
|
|
Opens the Reviews page, where you can view, edit, and manage Flare review files. See Reviews. |
|
|
Opens the Task Boards page, where you can create, edit, and view tasks. See Tasks. |
|
|
Opens the Teams page, where you can create and manage teams. See Teams. |
|
|
Opens the Users page, where you can manage and view users on the license. See Users. |