Creating Branches
From the Repository page, you can create branches (i.e., new development areas for your work). You might do this if you are documenting a new feature, rewriting large sections of a topic, or making structural changes.
[Menu Proxy — Headings — Online — Depth3 ]
Permission Required?
To create, delete, or merge branches, you must have the following permission setting:

How to Create a Branch
-
Open a project, and select Repository at the top of the page.
-
At the top of the grid area, select the Branches tab.
-
In the upper-right corner, click Create Branch.
-
In the Create Branch dialog, enter a Branch Name.
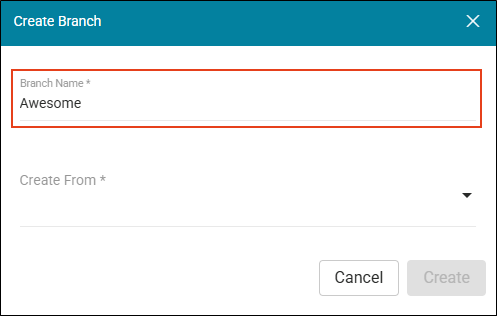
Note Keep the following guidelines in mind when creating a branch name:
-
Use only numbers, hyphens, underscores, forward slashes, lowercase letters from the ASCII standard table.
-
Do not use spaces.
-
Branch names should not exceed 128 characters.
-
Branch names with specifically 40 hexadecimal characters are prohibited (because they are similar to Git command hashes).
-
-
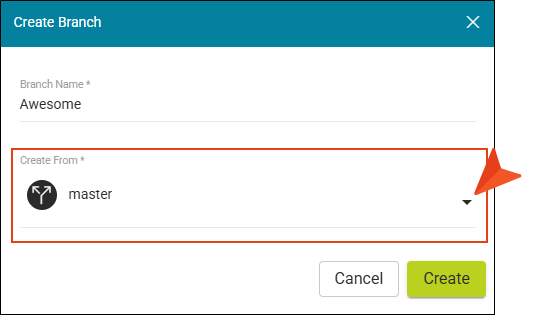
In the Create From drop-down, select a branch from the project as a basis for your new branch.
-
Click Create. The branch displays in the grid.
What’s Noteworthy?
Note Creating a branch for translation follows a different process. A translation branch is simply another development area for work specifically tied to the translation part of your project. Once created, a translation branch is available anywhere other project branches might be available in Flare Online.

