Glossary Proxy


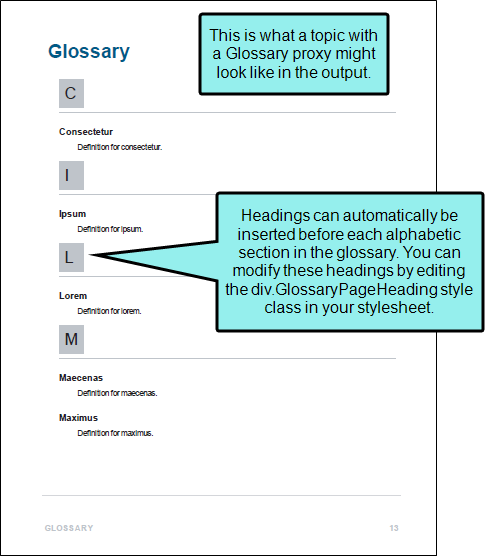
To produce a glossary manually for print-based output, you need to create a unique topic and insert a Glossary proxy into it. You can then add that topic into the table of contents (TOC) file. You also include a glossary in online output (instead of, or in addition to, using a skin or search results to display glossary terms and definitions).
[Menu Proxy — Headings — Online — Depth3 ]
Permission Required?
Editing content and project files is an activity available to users with the Author status. By default, users with Author status have the following permissions set:
-

If this is deselected, then viewing files in a read-only mode is allowed. On the left side of the page, the Files vertical three-dot menu is not available.
-

If this is deselected, the XHTML in the Code view is read-only.
Editing code is regarded as a capability for an advanced user. If not done properly, the code can become malformed quickly. Administrators can prevent users from editing the code by deselecting the Edit Code permission.
For more information about permissions, see Setting User Permissions or Setting Team Permissions.
How to Insert a Glossary Proxy
-
Open a project, and select the Workspace tab at the top.
-
On the left, navigate to a topic file. The file contents display on the right.
-
Place your cursor where you want to insert the proxy.
-
In the toolbar, click
 and select Glossary Proxy.
 -
(Optional) If you want headings (e.g., A, B, C, D) to be added automatically at the top of each section in the glossary, click the down arrow in the Generate Headings field and select Yes. Otherwise, select No.
-
(Optional) If you want to select a specific style class of the MadCap:glossaryProxy style to control its look and feel, you can enter it in the Stylesheet class field. If you do not enter a style class, Flare Online will use the main MadCap:glossaryProxy style automatically. For more details about styles, see the Flare Desktop Help system.
-
Click Insert. The proxy is added, represented by a gray rectangle.

