Menu Proxy

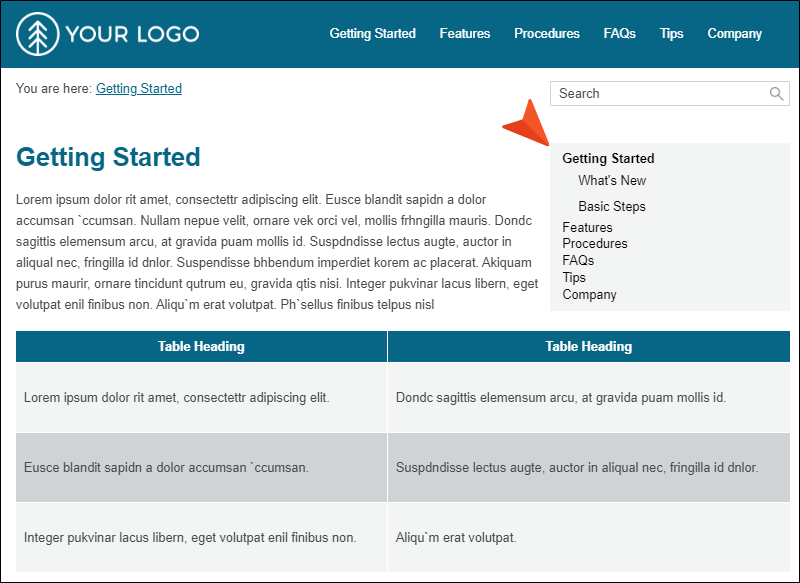
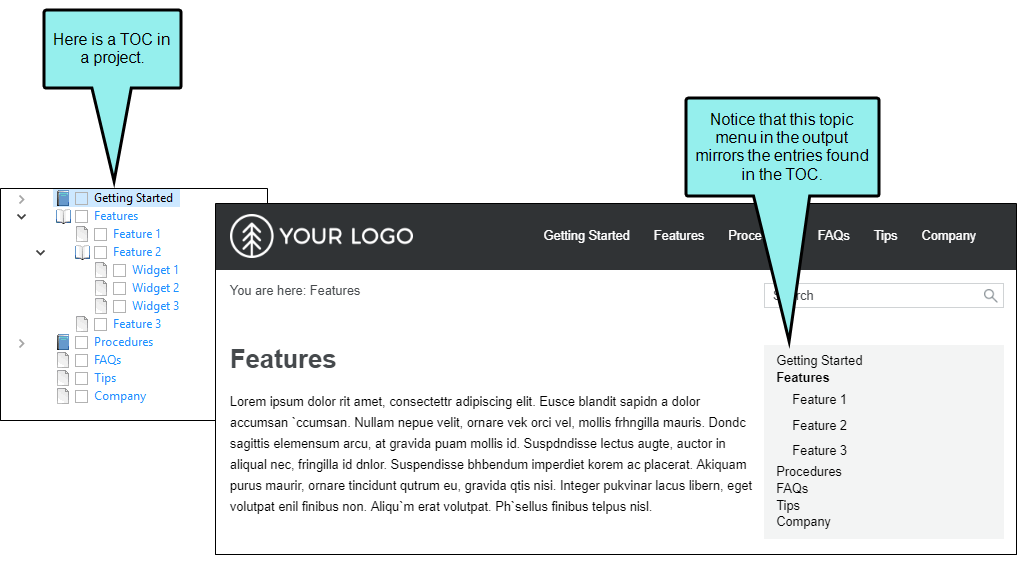
A Menu proxy lets you create a topic menu based on your TOC file, allowing users to navigate to other topics. This proxy can be especially useful if you are creating HTML5 Top Navigation or skinless output and you want a context-sensitive menu to display next to each topic. When you build the output, the proxy is replaced with the generated menu.
[Menu Proxy — Headings — Online — Depth3 ]
Permission Required?
Editing content and project files is an activity available to users with the Author status. By default, users with Author status have the following permissions set:
-

If this is deselected, then viewing files in a read-only mode is allowed. On the left side of the page, the Files vertical three-dot menu is not available.
-

If this is deselected, the XHTML in the Code view is read-only.
Editing code is regarded as a capability for an advanced user. If not done properly, the code can become malformed quickly. Administrators can prevent users from editing the code by deselecting the Edit Code permission.
For more information about permissions, see Setting User Permissions or Setting Team Permissions.
How to Insert a Menu Proxy
-
Open a project, and select the Workspace tab at the top.
-
On the left, navigate to a template page file, which is usually located under Resources > TemplatePages. The file contents display on the right.
-
Place your cursor where you want to insert the proxy.
-
In the toolbar, depending on the size of your screen, click
 and choose Menu Proxy, or select
  and choose Menu Proxy.
 -
You can complete the following options.
-
Use TOC, Browse Sequence, or Headings If you have more than one TOC file in your project, you can select the one that the Menu proxy should use. It is most common to base a menu on a TOC, but you can also select a browse sequence.
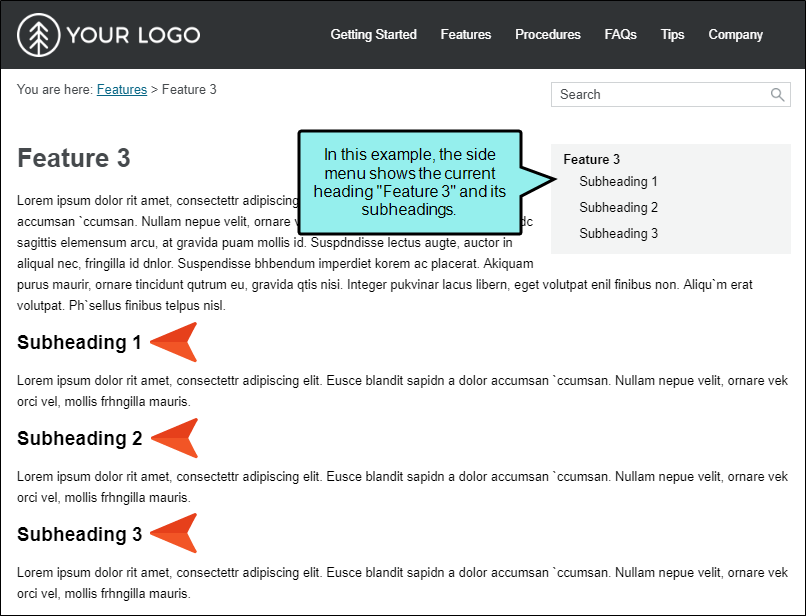
You also have the option of selecting “Headings,” which will display topic headings in the side menu instead. In other words, any headings or subheadings (e.g., h1, h2, h3, h4) that you’ve included in a topic will be shown in the side menu instead of other topics in the output.
-
Context sensitive Select this check box if you want the menu to show only closely related entries in the TOC. In Flare Online's Top Navigation project templates, this kind of proxy was inserted into a template page to create a side menu for most of the topics in the output.
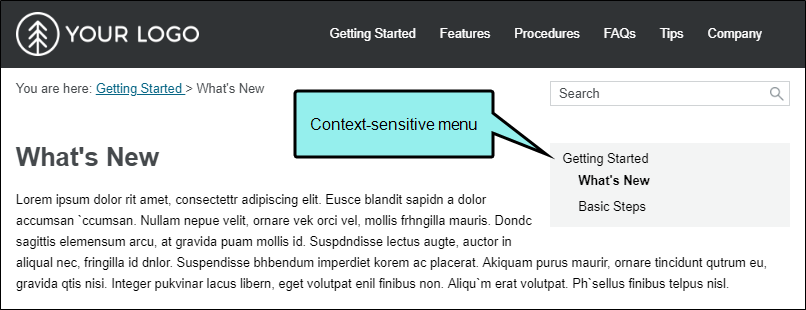
If you do not make the menu context-sensitive, it displays everything in the TOC (depending on the depth level you select).
-
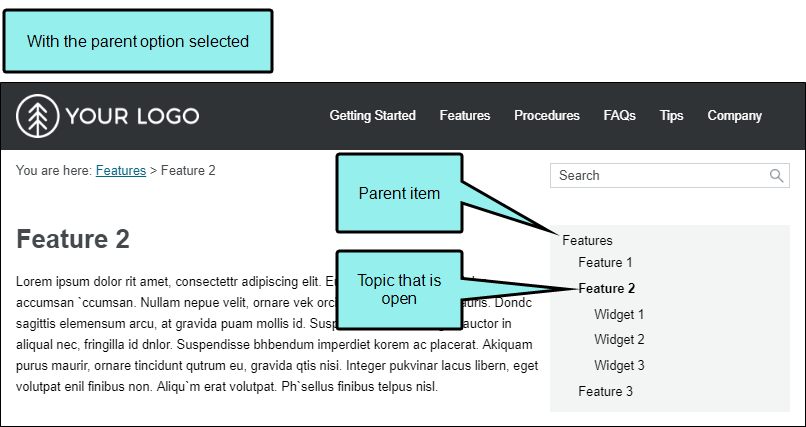
Include parent If you have selected the Context sensitive option, you can also select this check box to include the parent TOC item in the menu.

-
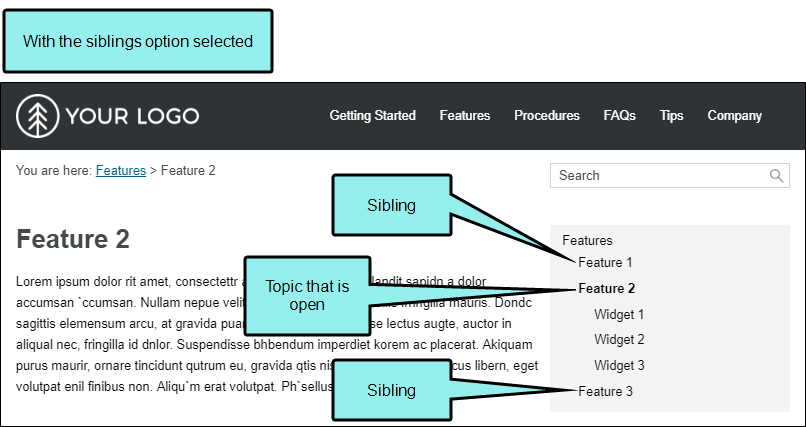
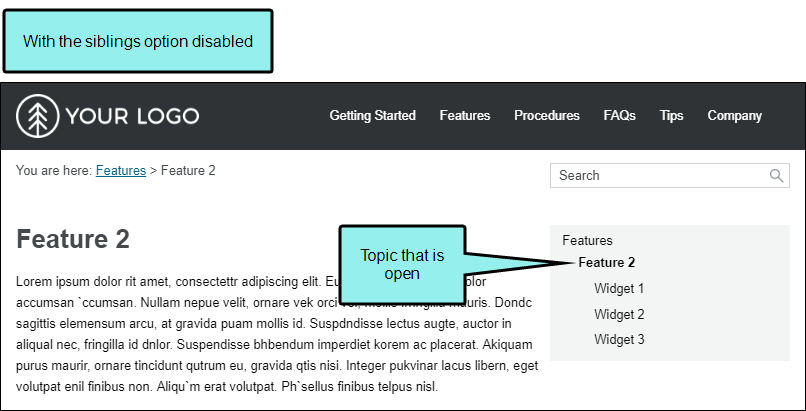
Include siblings If you have selected the Context sensitive option, you can also select this check box to include TOC items in the menu that are on the same level as the open topic.
-
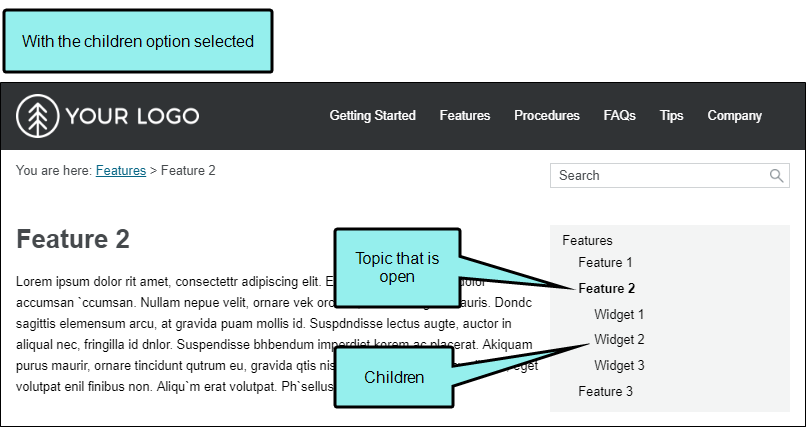
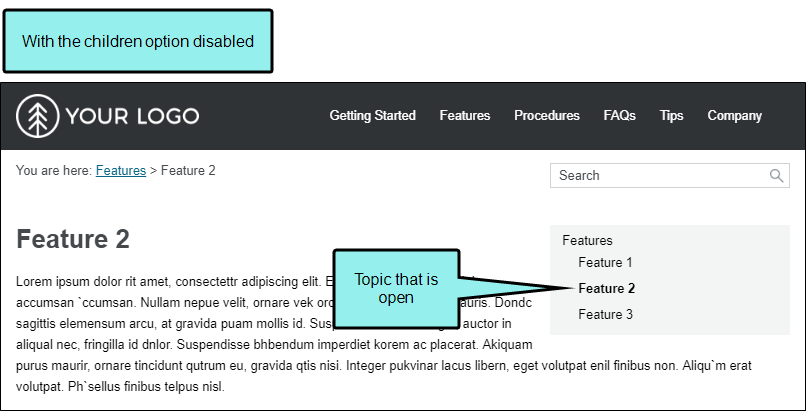
Include children If you have selected the Context sensitive option, you can also select this check box to include TOC items in the menu that are children of the topic that is open.
- Levels to Show (Depth) This lets you choose how many levels of items deep in the TOC to include in the menu. If the Context sensitive option is disabled, this refers to the depth level overall for the TOC. If both the Context sensitive and the Include children options are enabled, it refers to the number of levels under the topic that is open.
-
Skin If you have added a Menu skin component to your project and want to use it to control the look of the menu, you can select it from this field.
-
-
Click Insert. The proxy is added, represented by a gray rectangle.

