Creating TOCs


Books or entries are created in the TOC Editor, and then you need to link them to existing files from the project. To create the structure of your TOC, you can insert, add, edit, move, or delete TOC entries (e.g., topics, images, multimedia, TOCs).
[Menu Proxy — Headings — Online — Depth3 ]
Permission Required?
Editing content and project files is an activity available to users with the Author status. By default, users with Author status have the following permissions set:
-

If this is deselected, then viewing files in a read-only mode is allowed. On the left side of the page, the Files vertical three-dot menu is not available.
-

If this is deselected, the XHTML in the Code view is read-only.
Editing code is regarded as a capability for an advanced user. If not done properly, the code can become malformed quickly. Administrators can prevent users from editing the code by deselecting the Edit Code permission.
For more information about permissions, see Setting User Permissions or Setting Team Permissions.
How to Create a TOC
-
Open a project, and select the Workspace tab at the top.
-
From the left side of the page, expand the existing folders to navigate to a file. You can also click
 to search for a specific file.
Tip Click the Open Filters button, and select from the File Type drop-down TOCs. This filters only the TOC files to display in the files panel.
-
Do one of the following:
-
In the local toolbar, select
 (Insert child item) or
  (Add sibling item). These two options create a new TOC entry item.
Note To enable all local toolbar items, select a TOC node in the editor.
-
If there is a placeholder item, hover over the TOC node, and select from its context menu to the right
or . Or you can use  (Properties) for an item, this replaces the TOC entry with a new entry. (You can also apply conditions to entries or delete nodes.)
-
-
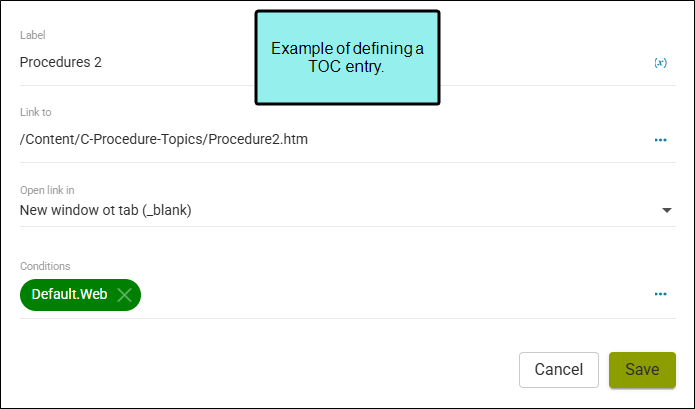
In the dialog, complete these fields.
-
Label Click
 to insert a variable from the Variables dialog, and select System > LinkedTitle. This links the topic title with the TOC label, showing the first heading from that topic as the TOC entry. The variable displays as syntax, but in the output the variable definition is shown.
 -
Link to Enter a file path (e.g., /Content/Introduction.htm) or click
 to select a file. If the latter, in the Select File dialog, choose a File Type and File Path.
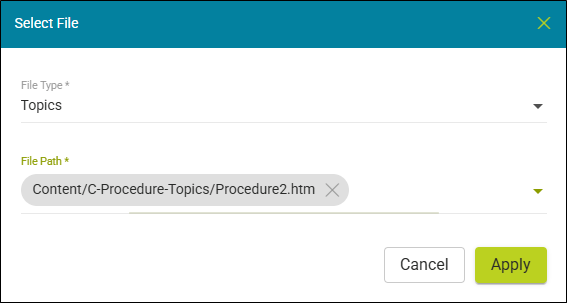
-
Open link in (Optional) From the drop-down select how the link will open in a browser. Choices are a Default frame, New window or tab (opening blank), Parent frame (of the current topic while hiding that topic), Same frame (as the current topic), Full body of the window (in the same output window but removing other framesets).
-
Conditions (Optional) Click
for the Apply Condition Tags dialog and assign condition(s) to TOC entries.
-
-
Click Insert (or Save if you opened Properties). Work through all the entries to get your TOC the way you want it.
-
In the upper-right corner of the editor, click Commit.
-
In the Create New Commit dialog, enter a Commit Message.
-
Click Commit.
Note When a new project is created with Flare Online it includes one or more placeholder TOCs, which you can change as you need. The TOC(s) provided depends on the source template selected. It might include a TOC intended for online output, online and print, or just print.

