Applying Styles to Content


Authors can select and apply styles to content for topic or snippet files in the Content Editor. This includes basic HTML elements, inline formatting, and existing style tags and style classes defined in a cascading stylesheet (CSS).
Reviewers can see styles applied to content in the Review Editor for a better viewing experience, but have limitations when applying styles.
[Menu Proxy — Headings — Online — Depth3 ]
Permission Required?
Editing content and project files is an activity available to users with the Author status. By default, users with Author status have the following permissions set:
-

If this is deselected, then viewing files in a read-only mode is allowed. On the left side of the page, the Files vertical three-dot menu is not available.
-

If this is deselected, the XHTML in the Code view is read-only.
Editing code is regarded as a capability for an advanced user. If not done properly, the code can become malformed quickly. Administrators can prevent users from editing the code by deselecting the Edit Code permission.
For more information about permissions, see Setting User Permissions or Setting Team Permissions.
Selecting Styles
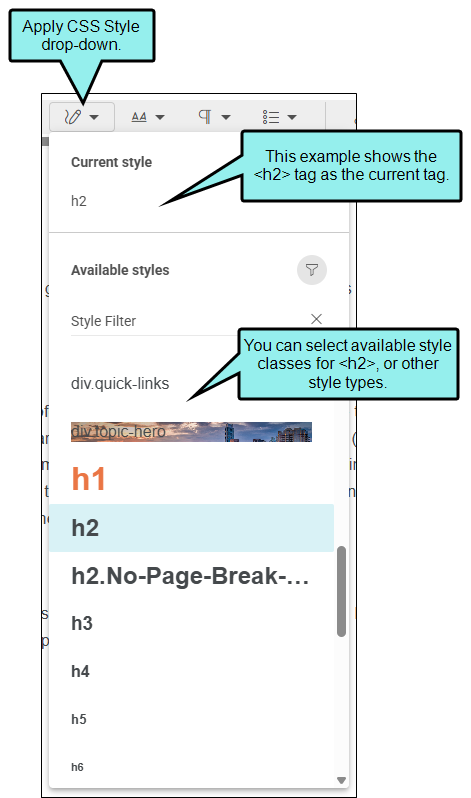
When you select a style in the editor, it becomes the active current style. From the local toolbar, click the Apply CSS Style drop-down to view style classes for the current style tag selected (e.g., the <p> tag might have the class <p.footer>). It also lists other style tags that you can change to (e.g., switch from <h1> to <h2>).
The drop-down is dynamic to the content selected, and is valid for block-level (e.g., <h3>, <p>, <div>) content, as well as character-level (e.g., <span>, <b>) content.
How to Apply a CSS Style
You can apply styles to the editor that are defined in your existing CSS file.
- Open a project, and select the Workspace tab at the top.
-
From the left side of the page, expand the Content folder (and any subfolders if necessary).
-
Locate a topic or snippet and click it. The file opens to the right in the Content Editor.
-
Click or select the appropriate content in the file. (Styles from the CSS file render by default.)
-
From the local toolbar, click the Apply CSS Styles drop-down. (Since the editor is responsive the drop-down may display as a collapsed or expanded element.)
-
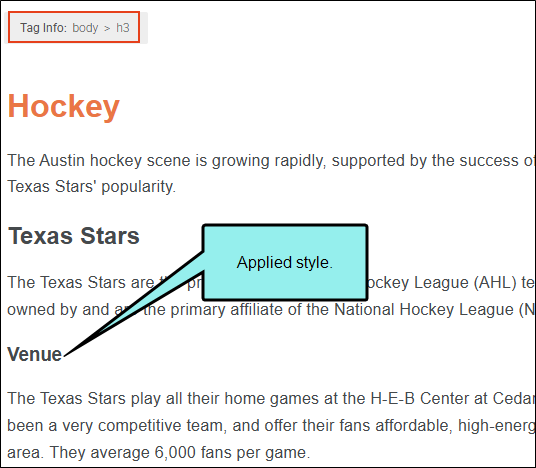
From the drop-down, choose a style to apply to your selected content. The content in the editor updates to the selected style.
-
Click Commit.
-
In the Create New Commit dialog, verify the new file path, and enter a Commit Message.
-
Click Commit. (Or click Cancel, to back out of the process.)
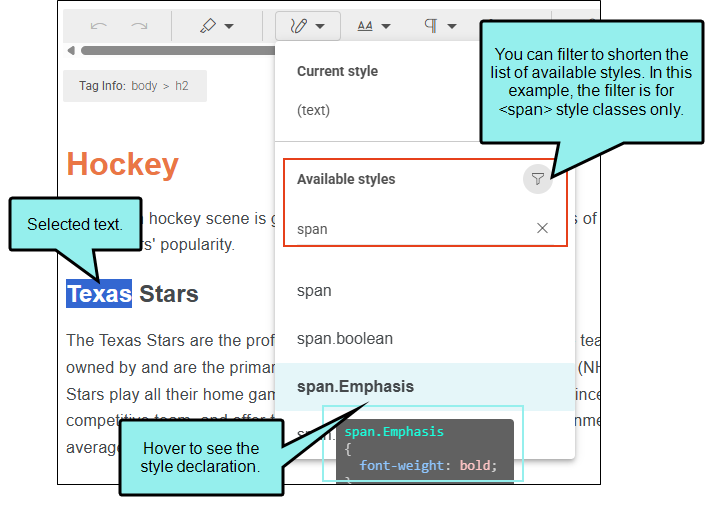
Example You might identify text within a paragraph where you want to apply a style (e.g., span). After the text is selected, click the Apply CSS Style drop-down.
If the list of available styles is long, the drop-down lets you to filter for specific styles.
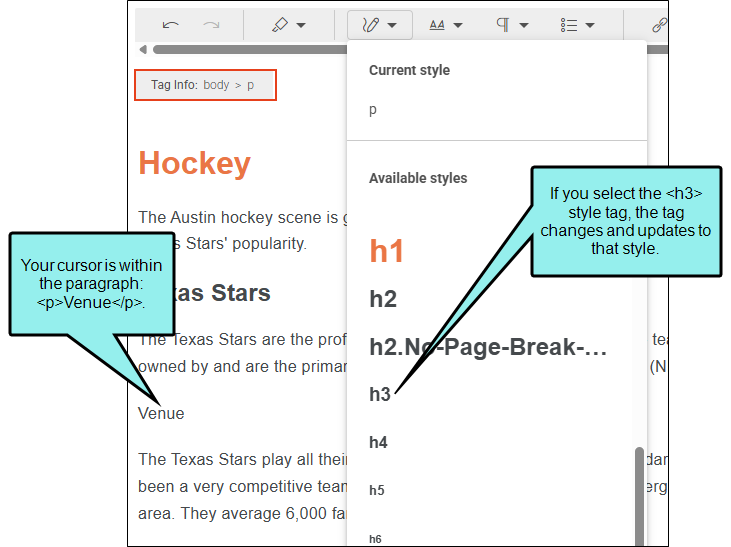
Example You have some content that needs to be changed to a heading 3 and render according to your CSS file.
Your cursor is on the regular paragraph where you want to apply the heading style to it. You then click the Apply CSS Style drop-down, and select <h3>.
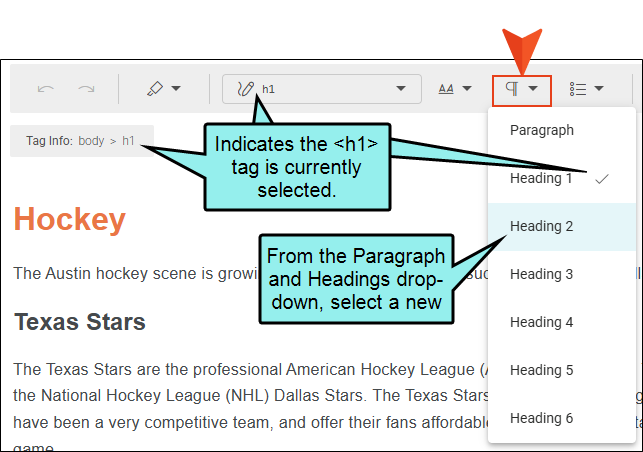
Example As an alternative, you can change the style tag type using the Paragraph and Headings drop-down in the local toolbar. If you place your cursor in the top heading (e.g., the <h1> tag) and want to change it to a second heading style (e.g., the <h2> tag), you can then simply select Heading 2 from the drop-down.
Basic Formatting Options
In addition to applying CSS styles, the local toolbar has other options to format content.
|
Option |
Description |
|---|---|
|
|
This formatting does not replace a style tag but "wraps" inline to the style node (e.g., <p>text</p> becomes <p><i>text</i></p>). |
|
|
Lets you apply basic styles to block-level content:
Elements in the Paragraph and Headings drop-down replace the selected block-level content to a different tag (e.g., <p>text</p> becomes <h2>text</h2>). |
|
|
Lets you create and set list styles on content
|

 Applies bold typeface to the content selected in the topic.
 Applies italic typeface to the content selected in the topic.
 Underlines the content selected in the topic.

 Applies a numbered list tag to the content.
 Applies definition list tags to the content.
 Indents the list item(s). This option pertains only to lists, not other kinds of content.
What’s Noteworthy?
Note Flare Online's lightweight editor is responsive. This means that elements of the workspace—local toolbar items, shift automatically if you resize the UI, move from a large screen to a smaller one, or change the resolution on your monitor.
