Creating Connectors
You can create a connector at the license level or at the user level.
-
License level Set up a connection where all users on your license can use it. In other words, all publications are done with the configuration of that connector.
-
User level Set up a connection for each user. This is useful if you want each user to publish, or if different users have different access levels at the publishing destination.
[Menu Proxy — Headings — Online — Depth3 ]
Permission Required?
For this activity, you must have the following permission to control and allow access to external servers:

A user with Administrator rights is expected to have the Manage Integrations permission to integrate a connector with a Flare Online license.
For this activity, you must have the following permission:

Users associated with a project only need the Publish Builds permission for publishing output.
For more information about permissions, see Setting User Permissions or Setting Team Permissions.
How to Create a Connector
-
Do one of the following:
-
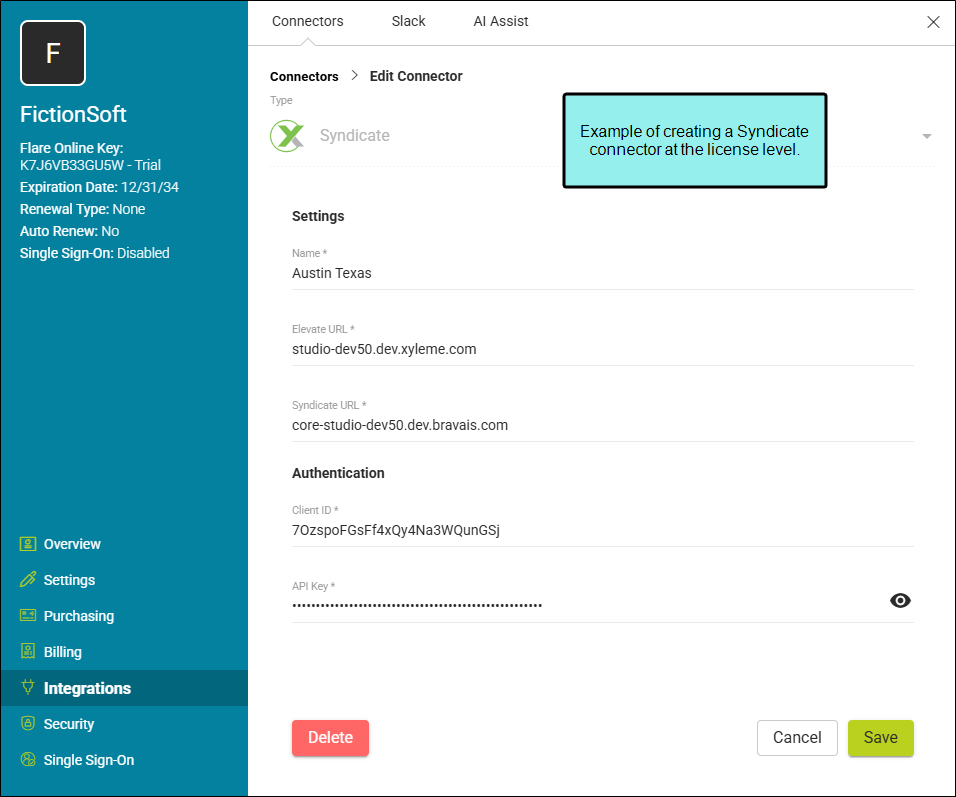
For a license-level connector
-
In the upper-right of Flare Online, click your license avatar (or the first letter of your license if you haven't yet chosen an avatar image) and select License Settings.
-
On the left, select Integrations.
-
Select the Connectors tab (if it does not have focus).
-
Click New Connector.
-
-
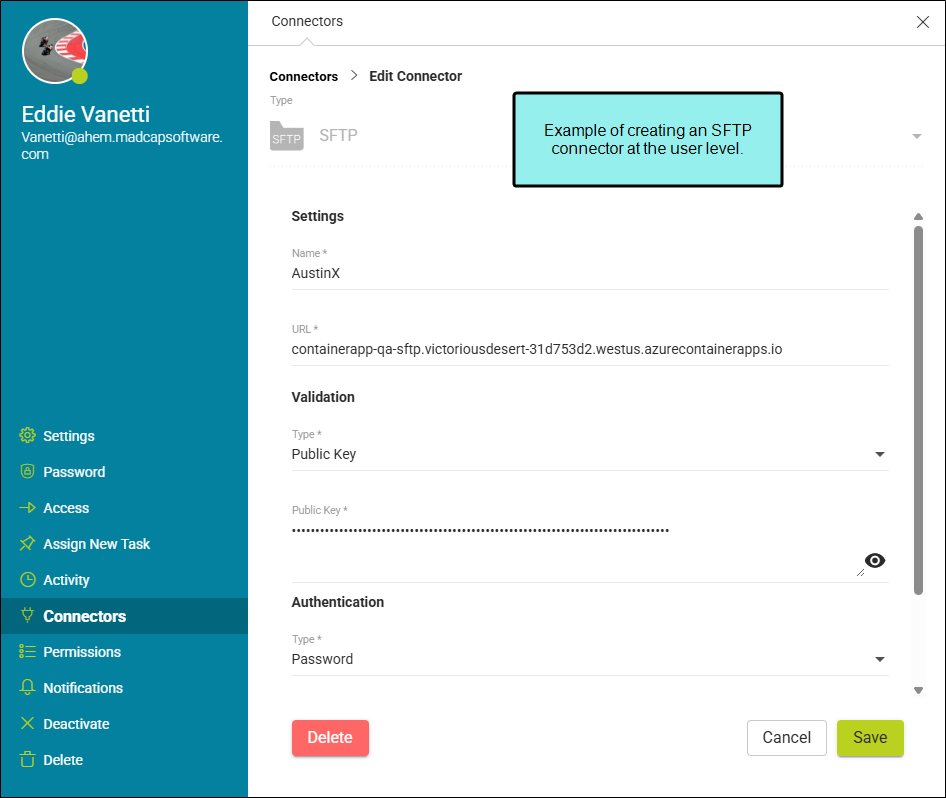
For a user-level connector
-
In the upper-right of Flare Online, click your user avatar.
-
On the left side of the profile, select Connectors.
-
Click New Connector.
-
-
-
From Type, select Syndicate or SFTP. Depending on the connector type, the fields you see vary.
Syndicate
-
In the Settings area, do the following:
-
Name Enter a name for the connector. It can be anything.
-
Elevate URL Enter the Elevate URL (e.g., studio-[customer].xyleme.com)
-
Syndicate URL Enter the Syndicate URL host name (e.g., core-[customer].bravais.com)
Note It is the Delivery (CORe) API that is used to publish content to Syndicate. The base URL for the API call is https://core-[domain].bravais.com, where [domain] is the user's domain name. CORe stands for Core Object Repository, and bravais is the legacy name for Syndicate.
-
-
In the Authentication area, enter the following:
-
Client ID Enter the Elevate-generated Client ID.
-
API Key Enter the Elevate-generated API Key.
-
SFTP
-
In the Settings area, enter the following:
-
Name Enter a name for the connector. It can be anything.
-
URL Enter the host name of the remote server or the computer where you want to publish the output files.
-
-
In the Validation area, from Type select:
-
None Select this if there is no validation of the SFTP server.
-
Public Key Select this to validate the server against a public key.
-
-
In the Authentication area, from Type select:
-
Password Select this if the server connection is authenticated by the user name and password.
-
Private Key Select this if the server connection is validated against a public or private key pair match. You need to supply the private key and password for the server.
-
-
-
Click Save.
Note Keep in mind that every connector URL is unique, and so you cannot have two pointing to the same location. However, if a connector exists in both levels, the user level wins.
Note To edit a connector simply open it and update the information. If you need to delete a connector, open it and select the Delete button.
