Commits
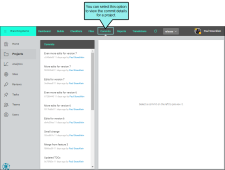
After opening a project in Central, you can see your commits associated with a project. You can also switch between branches (if you are using branching) to see the commits for each.
If permissions are set in Central that allow for authoring project files (i.e., add, edit, upload files), you can update files directly in Central. Changes that you want to keep need to be committed to the project. This is done through the Files page and Central’s editor.
[Menu Proxy — Headings — Online — Depth3 ]
Permission Required?
No special permission is required for this activity. All authors who are associated with the project are allowed.
What are Commits?
A commit is a collection of changes that are pushed to a project’s repository. You can commit files locally using Flare’s application, or you can commit files working remotely through Central’s editor.
Whether you are working in Central or Flare, adding comments to each commit is required. Comments are an easy way to see what types of changes are included in that commit. It is up to you to decide which changes are included in a commit before you continue making further changes that go into the next commit after that.
-
Central side A commit can be viewed in Projects using the Files or Commits page.
-
Flare side Flare commits need to be pushed up to Central to keep the files synchronized. Once the files are synchronized, you can view a commit in Central.
Viewing Commits Page
If you want to view details about your commits on Central, do one of the following from Projects.
-
Click Commits at the top. The left side of the page lists the commits associated to all project files. If you click the row for the committed file, the Commit view opens to the right with changed items.
-
Click Files at the top. When you select a file it displays in the editor to the right. Click the Commits button in the editor. This lists all the commits pertaining to the selected file. If you click the commit item for a file, it displays the Commits page, and the Commit view opens where you can see exactly what changed.
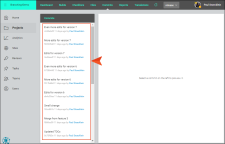
All of the commits for the project are listed, with the most recent one at the top.
Switching Branches
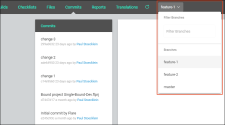
If you are using branching, you can click the drop-down at the top of the page and switch from one branch to another. The commits specific to that branch will display accordingly on the page. A filter field at the top of the drop-down lets you limit the branches shown.
Viewing Individual Commits
If you click any of the commit items, the Commits view opens allowing you to see what changed. You will often see two versions of the files involved in that commit. The background color shows changes. For example, more recent changes have a green background.
You can use the following buttons to switch between a Unified view and a Split view:

In a Split view, the differences look like this:
Sometimes a commit might show code on only one side of the page or the other. This usually happens when you have added or deleted a file in the project.


