Associating Conditions With Targets


Note Only the most common target options are available in Central. For all of the additional target options—and to add or edit targets for the other output types not supported in Central—you need to use Flare.
After creating and applying conditions, you need to tell Central what your target should do with those conditions. Should content with a particular condition tag be included in or excluded from that target, or should it display only when viewed on a certain device or screen size?
[Menu Proxy — Headings — Online — Depth3 ]
Permission Required?
Editing content and project files is an activity available to users with the Author status. By default, users with Author status have the following permissions set:
-

If this is deselected, then viewing files in a read-only mode is allowed. On the left side of the page, the Files vertical three-dot menu is not available.
-

If this is deselected, the XHTML in the Code view is read-only.
Editing code is regarded as a capability for an advanced user. If not done properly, the code can become malformed quickly. Administrators can prevent users from editing the code by deselecting the Edit Code permission.
For more information about permissions, see Setting User Permissions or Setting Team Permissions.
How to Associate Conditions With a Target
-
From the Projects page (Files tab), open a target and in the upper-right click Edit.
-
On the left, make sure General is selected.
- On the right side of the Conditional Expression field, click
 .
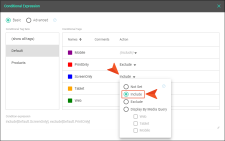
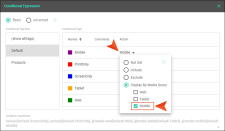
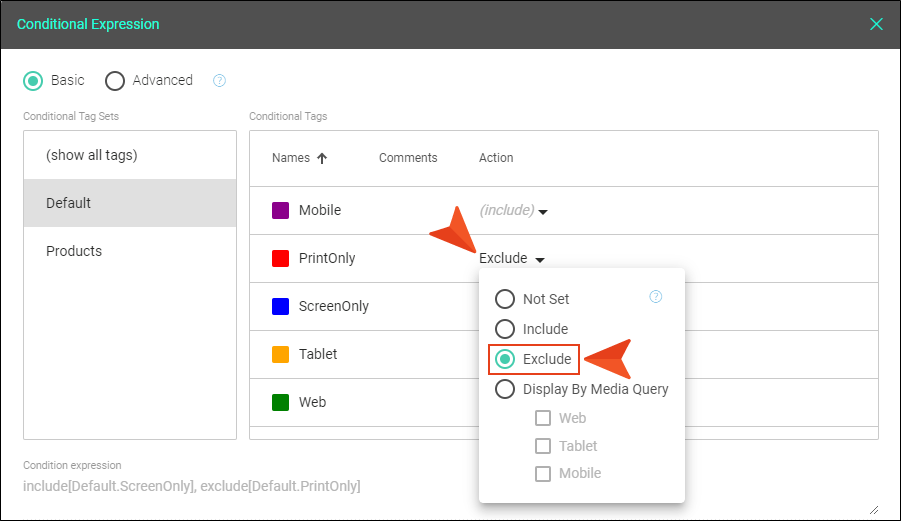
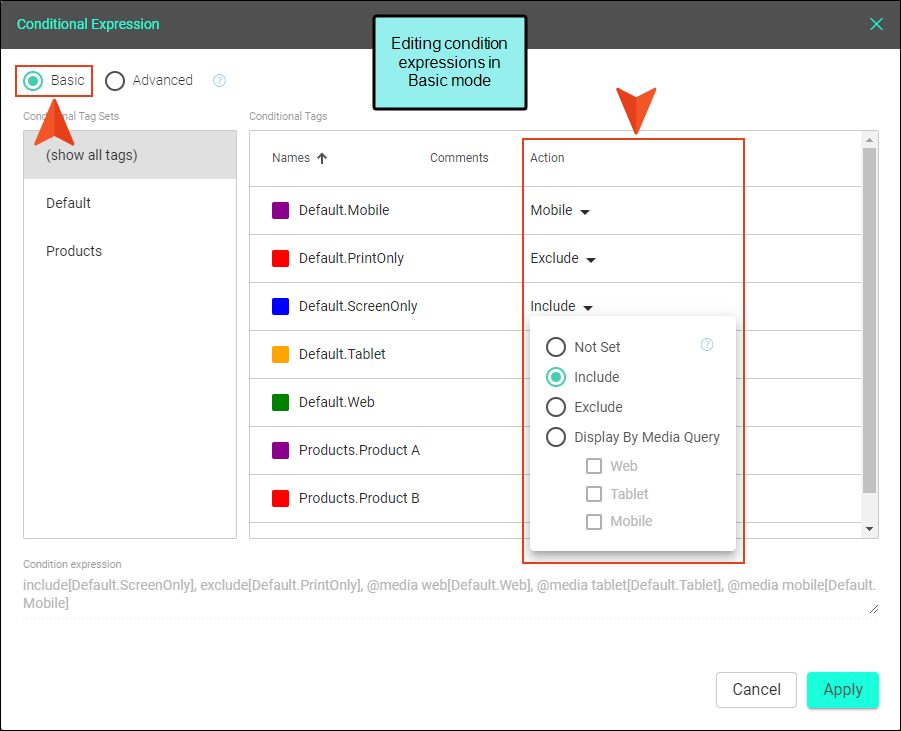
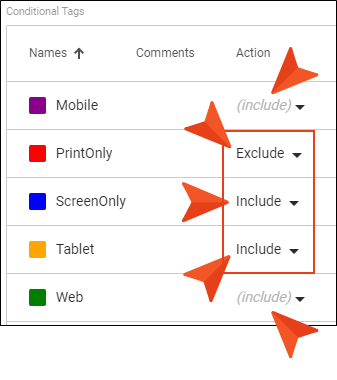
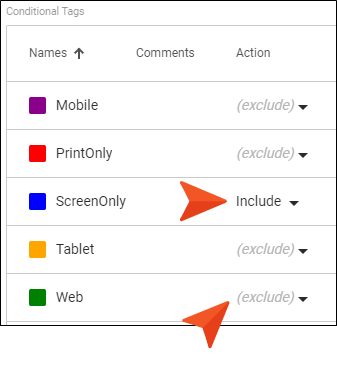
. - In the Condition Tag Sets area, you can choose to view tags for all condition tag sets or you can select a specific set. The tags associated with the selected set are shown to the right, with their associated colors. An Action cell appears next to each condition tag. When Basic is selected, the Action cell is shown and the Advanced section below is disabled.
-
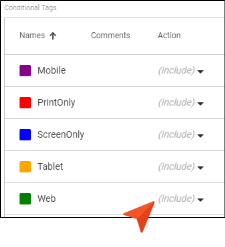
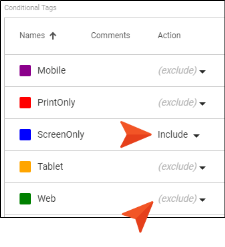
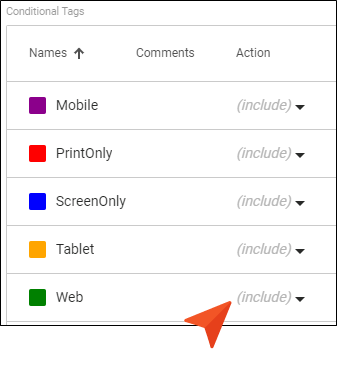
The Action cell in the grid indicates the current setting for the condition. The text is gray if you have not explicitly chosen an option.
Action Options
-
Not Set If an action is not set on a condition, its behavior may vary (i.e., it might be included or excluded). This depends on whether or how you have set other conditions.

-
Include Select this if you want the content associated with the condition to always display in the target’s output.
-
Exclude Select this if you want the content associated with the condition to never display in the target’s output.

-
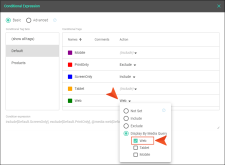
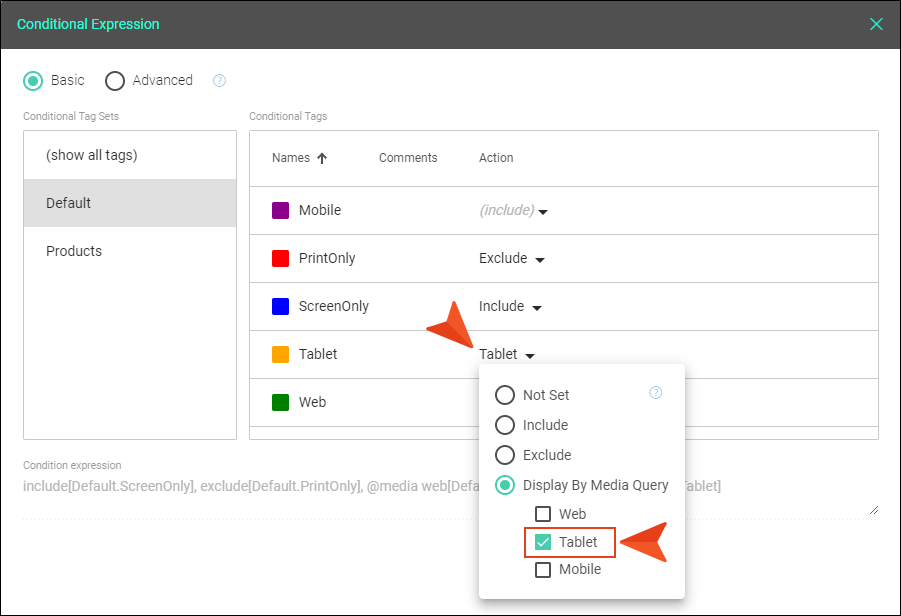
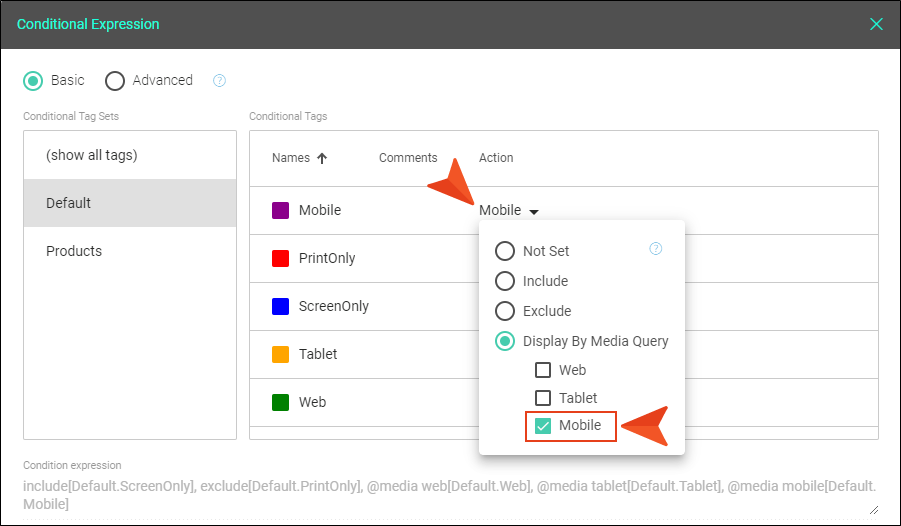
Display by Media Query Select this if you are working in an HTML5 target and want the content associated with the condition to display only when the user is viewing the output on a particular device or screen size (according to the responsive output breakpoints that are set in the target or skin).
After selecting this option, choose one or more of the media query check boxes. The Active cell in the grid updates accordingly.
-
Web The content will display if the user is viewing it on a large screen.
-
Tablet The content will display if the user is viewing it on a medium screen, such as an iPad.

-
Mobile The content will display if the user is viewing it on a small screen, such as an iPhone.
-
When you create condition tag expressions, you have the choice of working with conditions in Basic or Advanced mode. You can switch between the two modes by clicking Basic or Advanced
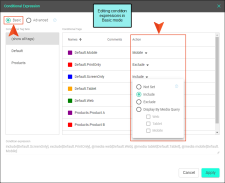
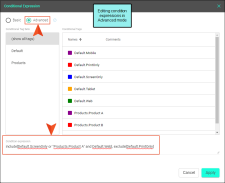
Warning If you decide to use the Advanced mode, the expression automatically inherits any settings that have already been made in Basic mode. However, if you make changes in Advanced mode, you should continue in that mode from this point on. If you switch back to Basic mode, you will lose settings.
Warning The condition feature is an inclusive system. If you do not select any options, all of the tags will automatically be included, as indicated by the gray text in the Action cell. If you include only some tags and exclude others, any remaining tags without options specifically set will automatically be included. However, if you select Include for any of the tags (even just one) and do not select Exclude for any tags, all of the other tags that do not have the Include option set explicitly will automatically be excluded. If you have not explicitly set an option for a condition tag, make sure you look at the gray text in the Action cell to know what will happen for that tag in the output.

-
-
Click Apply.
-
Click Commit. (Or click Cancel, to back out of the process.)
-
In the Create New Commit dialog, enter a Commit Message.
-
Click Commit.


Note When you generate the target, Central uses the expression from the section that is last saved—Basic or Advanced.

