Creating Checklists
You can create checklists to keep track of work related to your projects.
Note Checklists can be created for committed files, and cannot be used for pending workspace files.
[Menu Proxy — Headings — Online — Depth3 ]
Permission Required?
To create, edit, or delete checklists or checklist templates, you must have the following permission setting:

Note Users associated to the project without the permission can mark items on the checklist (i.e., changing statuses) and can click to add a note for a particular row.
How to Create a Checklist
- Select Projects on the left side of the interface, then click a project name to open it.
- At the top of the interface, click Checklists.
- In the toolbar click
 . The Create Checklist Wizard opens.
 -
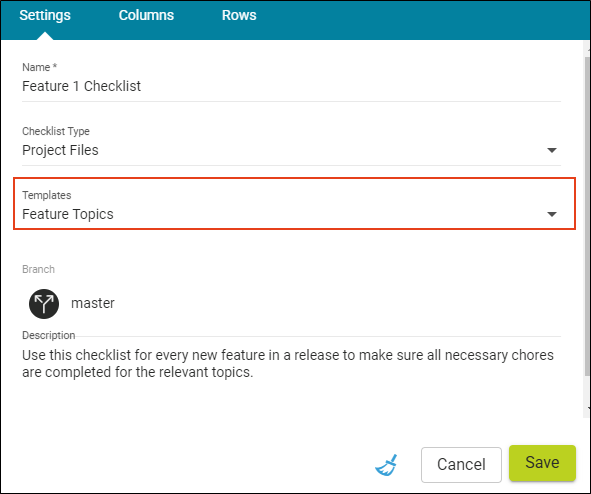
(Optional) If you have previously created a checklist template, the place to apply it is in Settings (i.e., the wizard's first screen). You can click the Templates field and choose it (see Creating Checklist Templates). Information from the template (e.g., type, description, columns) will populate corresponding fields. After the fields are populated, you can edit them if necessary.
-
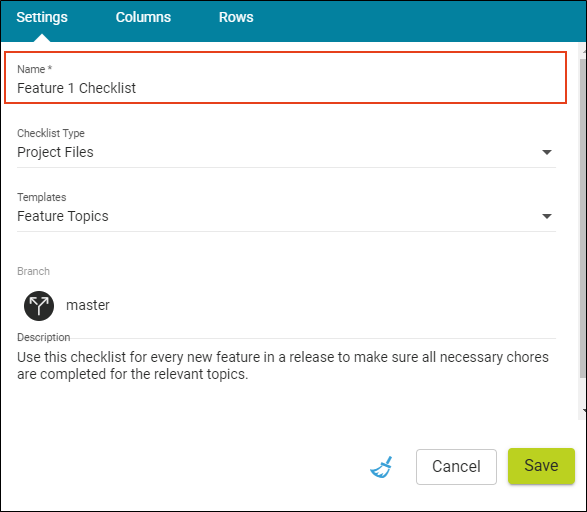
Complete the Name field.
-
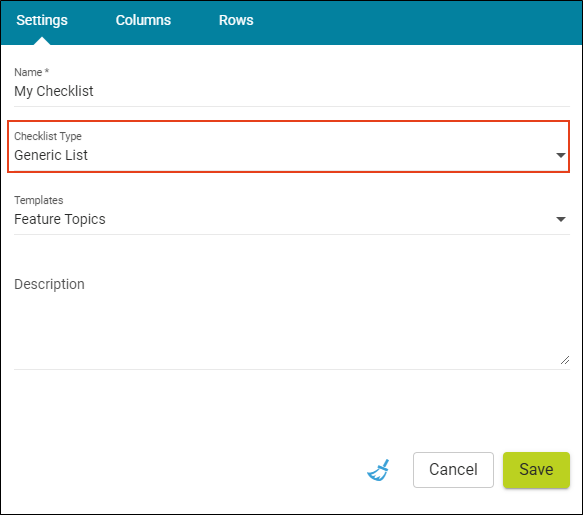
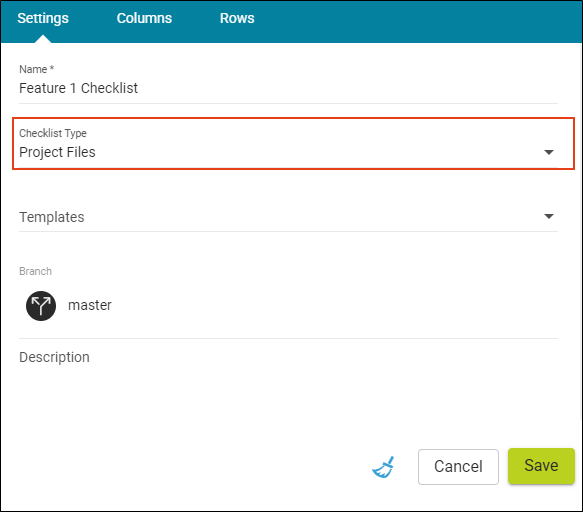
From the Type field, select a generic list or project files checklist type.
-
Generic List This lets you add a checklist where each row is manually created. The checklist can pertain to anything you want.
-
Project Files This lets you add a checklist where the rows are based on files from your project. Most commonly, these kinds of checklists will be used to track the progress of topics as you edit them, but you can create checklists that include any other kinds of files from the project (e.g., template pages, images, TOCs, targets, skins).
-
-
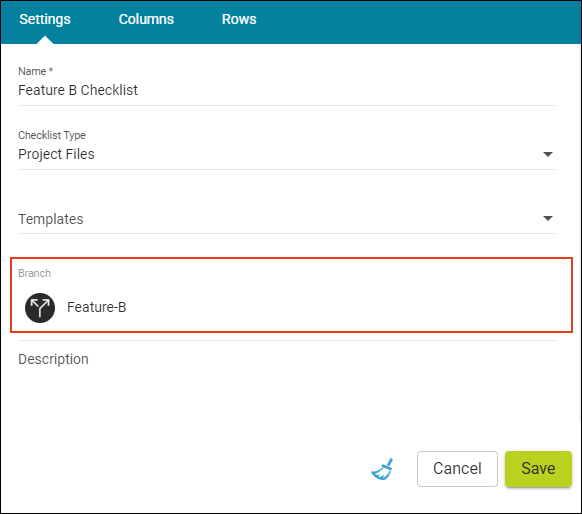
If you are creating a "Project Files" type of checklist and using branching (which is highly recommended), click the Branch field. Then, select the name of the branch to be associated with the checklist.
-
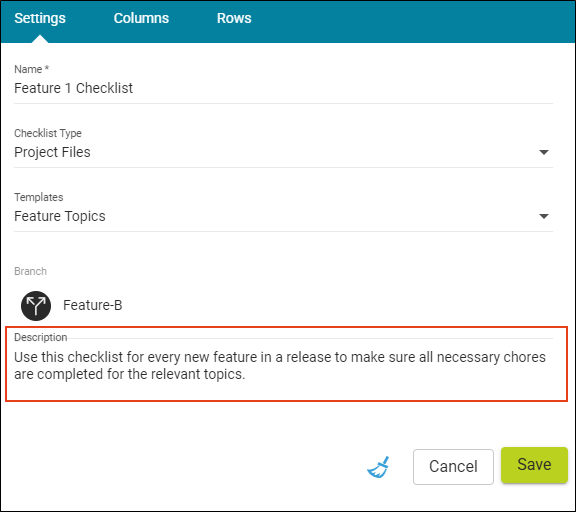
(Optional) You can complete the Description field if you want a more detailed explanation of the checklist for yourself and other writers on your team.
-
Click Next.
-
For Columns, create columns by typing a label in the text box and pressing ENTER or clicking
 . Repeat this for each column you want to add. You can use the up and down arrows to change the order of the columns (the column at the top of the dialog will appear at the far left in the checklist, and the column at the bottom will appear at the far right).
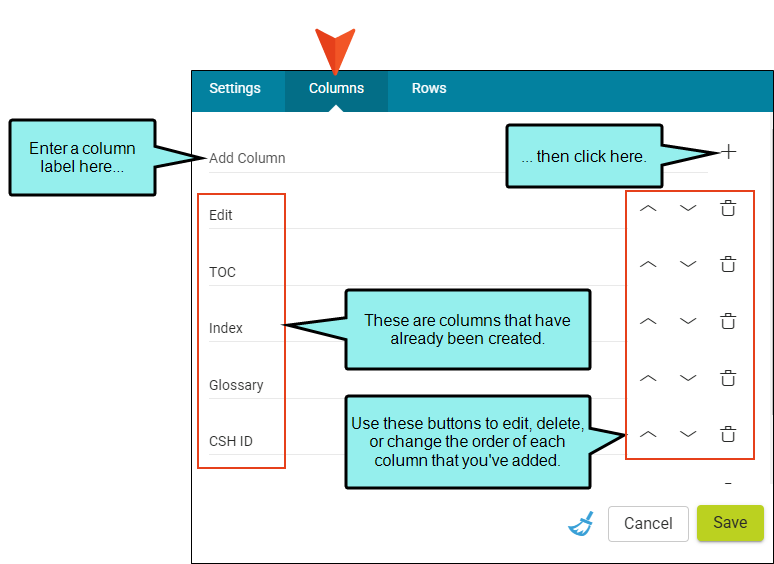
- Click Next.
-
In the Rows screen, create rows for the checklist. This is done differently, depending on the type of checklist you are creating.
-
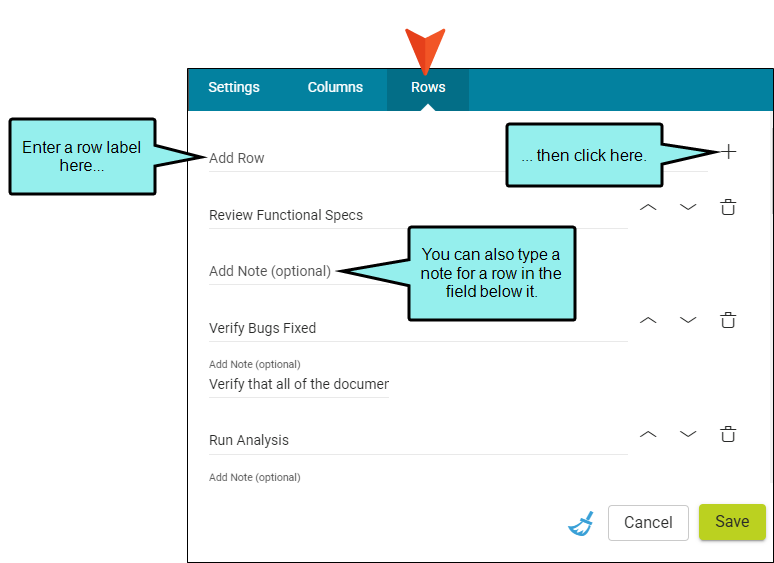
Generic List In the text box, type the label for a row and click
. Repeat this for each row you want to add. You can use the up and down arrows to change the order of the rows.You can also complete the Add Note field for any row.
-
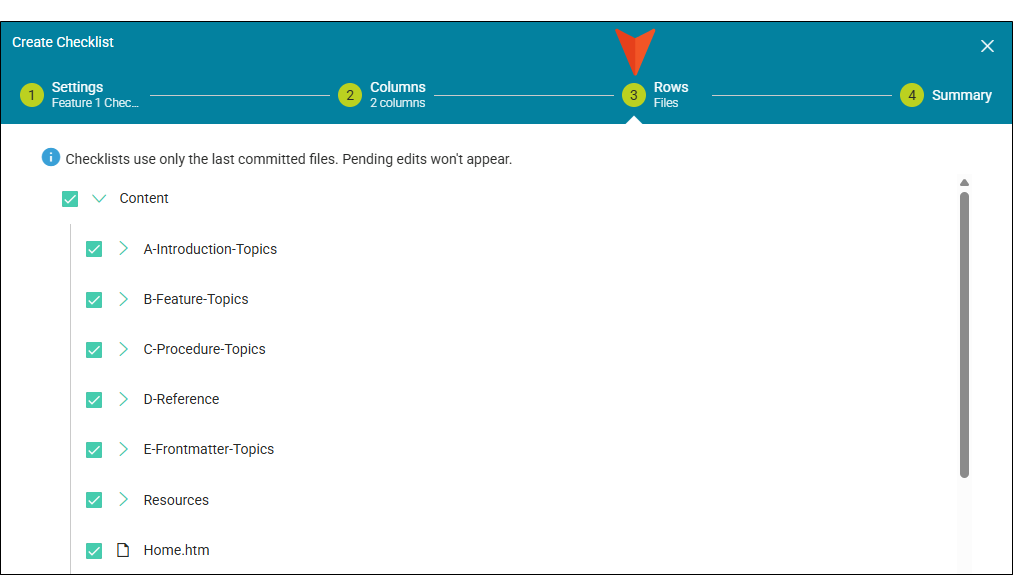
Project Files Your project folders and files are shown on the Rows screen. It is likely that you will only want to include certain files in the checklist. Any item that you select will show a check mark (to be included in the checklist). (All files are selected by default. Remove check marks for files you want to exclude.) You can select a folder to include all files within that folder, or you can navigate to the items you want to include and select them individually.
Example You have a project where the Content folder contains topics you want to create a checklist.
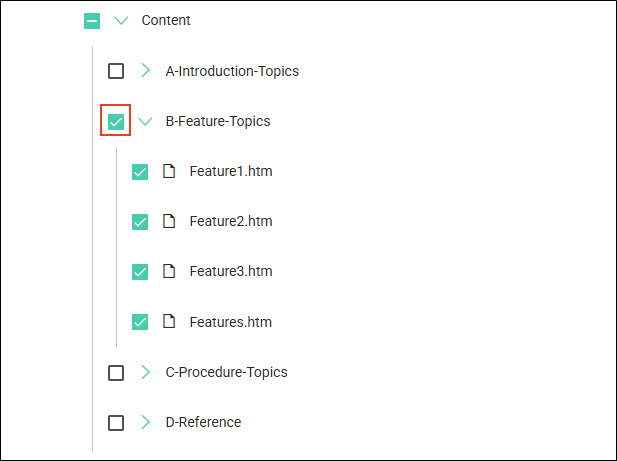
From the Rows screen, choose specific topics in the Content folder by clicking the arrow to the left to expand it. You will see all of the subfolders and files within it. (All check boxes are selected by default. You might want to deselect everything first.)
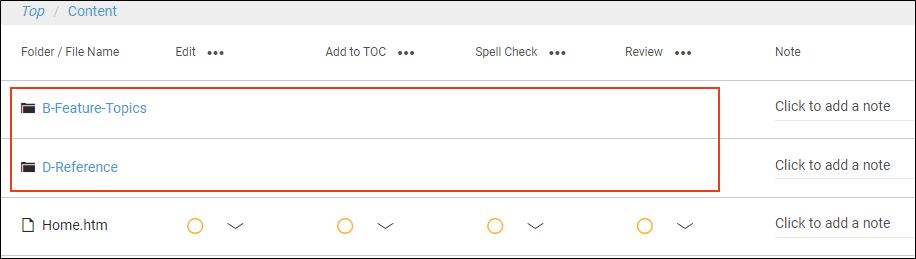
Since you want all of the topics in “B-Feature-Topics” to be included, click the check box next to that subfolder. If you expand that subfolder, you will see that all of the topics within it are selected.
You only want two of the topics in the “D-Reference” subfolder to be included, so expand that folder and select those topics.
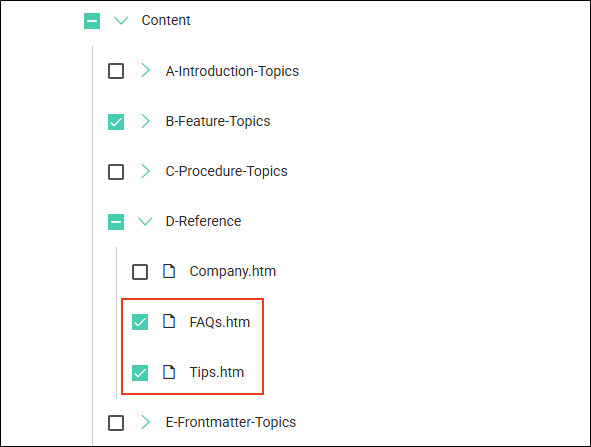
And finally, you want the Home topic at the root level of the Content folder to be included, so select it. The dialog should now look as follows when all subfolders are collapsed. Notice that the “D-Reference” subfolder has a small dash instead of a check mark; that’s because only some of the topics within it are selected.

-
- Click Next.
- The Summary screen displays information for the checklist you are creating. Click Back to edit again, or click Create Checklist . The checklist is created and its name displays on the left side of the interface. The checklist graph and items appear to the right.
-
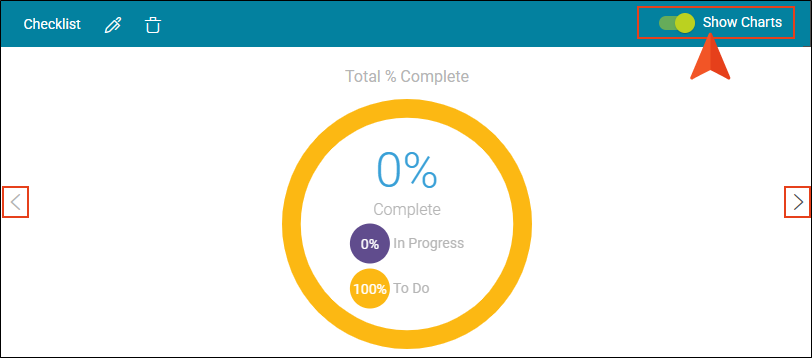
If you have created a checklist based on project files, you will see the first folder level (e.g., Content).
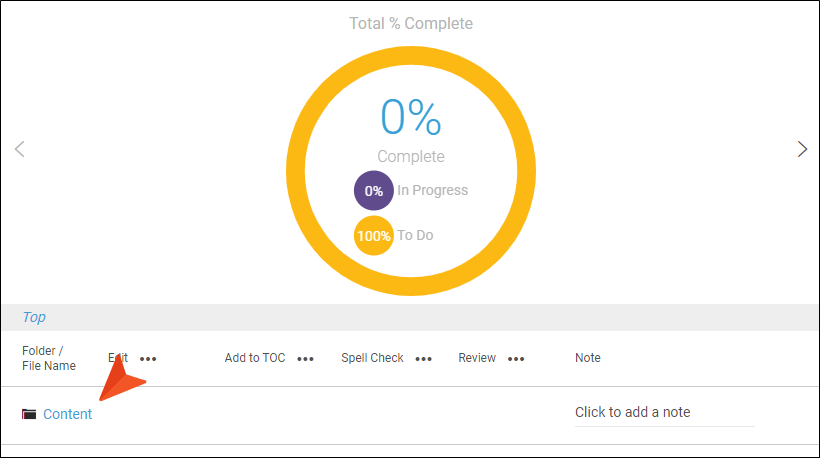
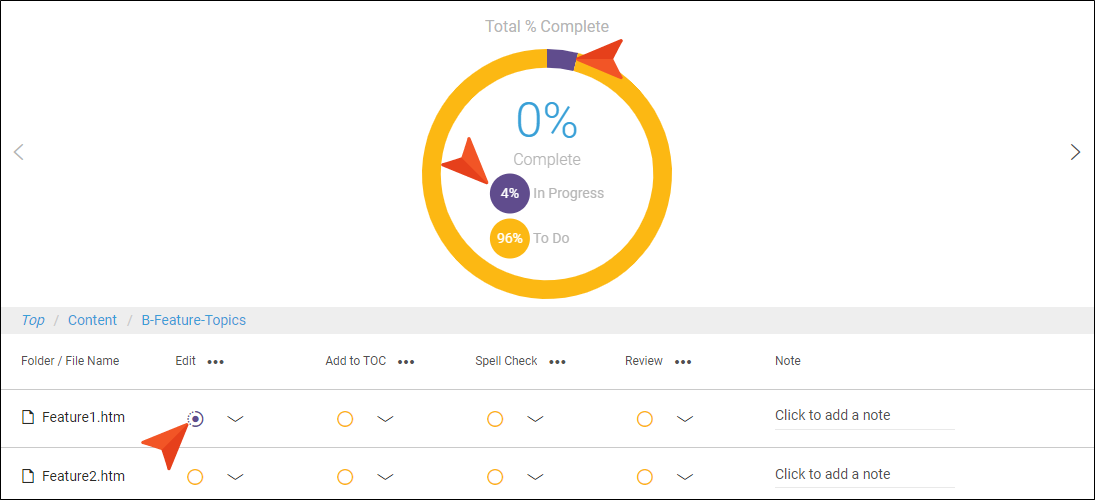
Note Since the Show Charts option is selected by default, the first folder level will display below the checklist graph. With Show Charts activated, you can click the arrow on the side of the current chart to see a different chart (e.g., Total % Complete, Checklist Item % Complete, and Checklist Completion Table). You can hide the visual display by clicking the Show Charts option.
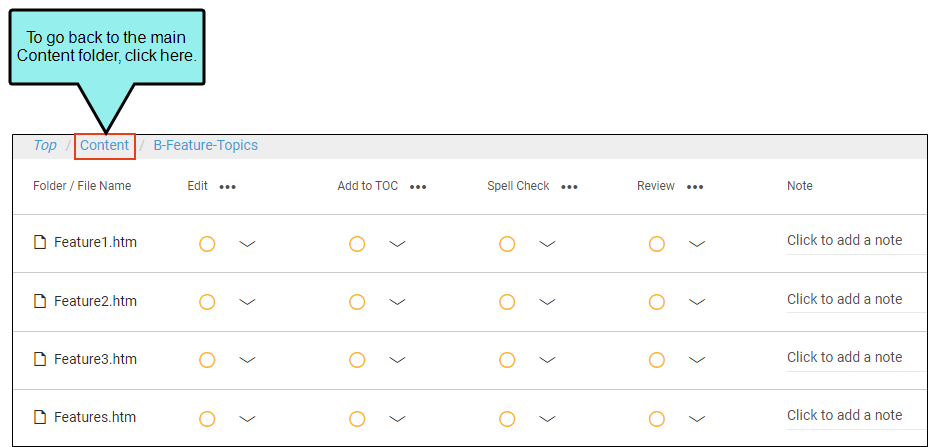
To navigate to a particular subfolder or set of files, click that folder. You will then see the content within that folder, as well as a breadcrumbs trail.
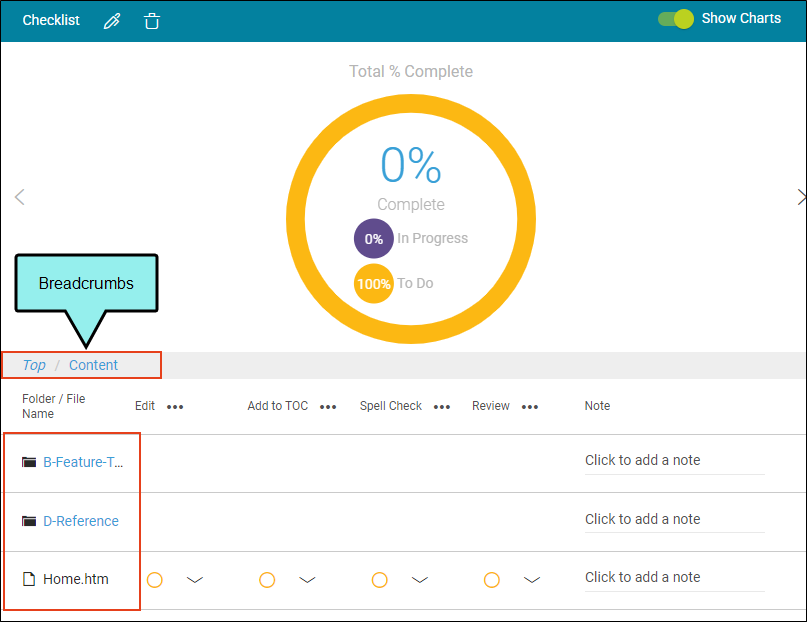
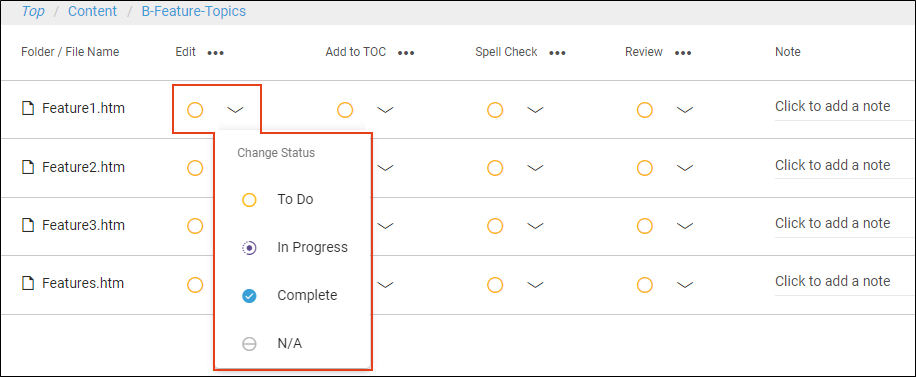
When you open a folder that contains files, you will see a circle for each column. These circles are where you set the status of each item.
Note You will not see the status circles for rows represented by folders. You can set the status for files only.
If you want to navigate back to a particular folder or subfolder, click it in the breadcrumbs.
-
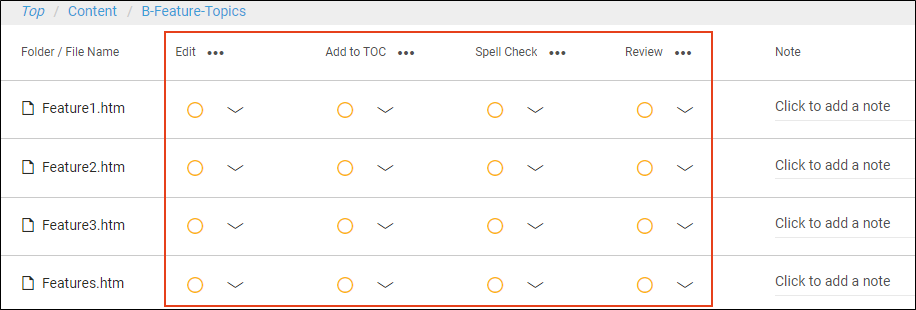
Click a circle and it will cycle through all the statuses each time you click. Alternatively, you can click the down arrow next to the circle and choose one of the statuses from the context menu.
- To Do
- In Progress
- Complete
- N/A Select this status if a particular column is not applicable for that row.
Depending on your selection, the appearance of the circle changes, and the graph is updated.
Tip You can click the ellipsis in a column heading to set all of the items in that column to the same status.
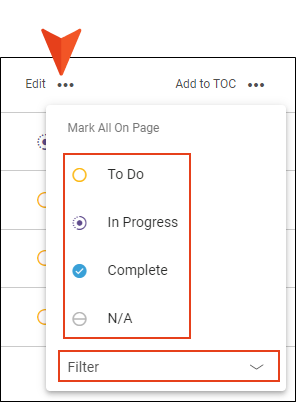
You can also click the Filter drop-down in the context menu to either select to filter only on a specific status, or clear a status type from the checklist.
- (Optional) If you want to add a comment for a particular row, you can click in the Note cell and type it.
Tip Although there is not currently any software integration between project checklists and tasks, you might find it helpful to create your own associations between the two as part of your overall workflow.
You have created a task to write a particular group of reference topics.
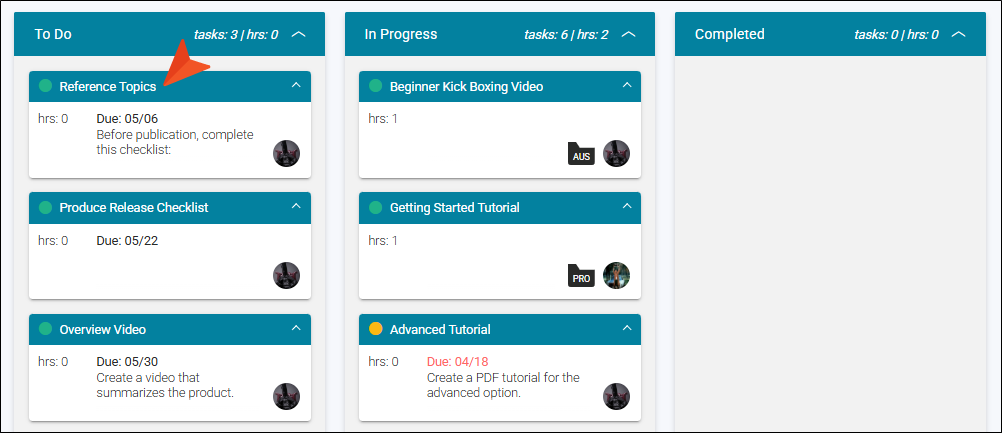
When creating or editing this task, instead of listing all of the things you need to do, you can paste a copy of the checklist URL in your task description and create a link to it.
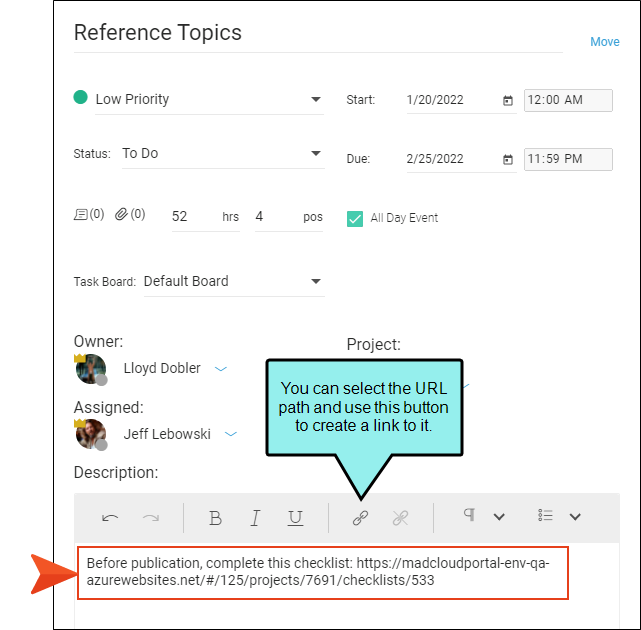
Once you finish the checklist, you can return to the Tasks page to move the task card to the Completed milestone.

