Merging Branches
Flare Online lets you merge from one branch to another branch.
Note You can only merge branches together that are clean common scenarios and conflict-free. If you attempt to merge branches that contain conflicts, you need to resolve those issues in Flare Desktop. See the Flare Desktop Help system.
[Menu Proxy — Headings — Online — Depth3 ]
Permission Required?
To create, delete, or merge branches, you must have the following permission setting:

How to Merge Branches
-
Open a project, and select Repository at the top of the page.
-
At the top of the grid area, select the Branches tab.
-
In the toolbar, click
 . The Merge page opens.
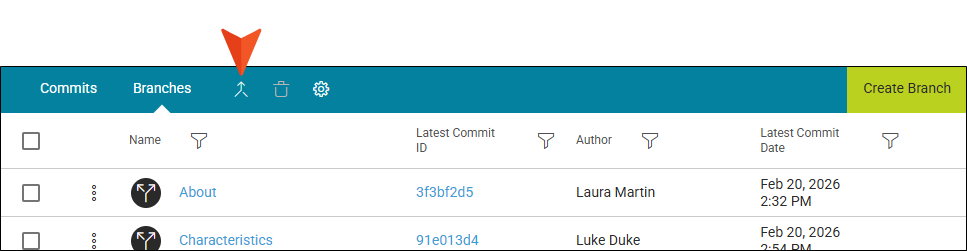
Note Alternatively, from the branch row in the grid, click the three-dot
 context menu, and select Merge. If you use this method, some fields will be auto-populated in the Merge page, but you can update the information.
 -
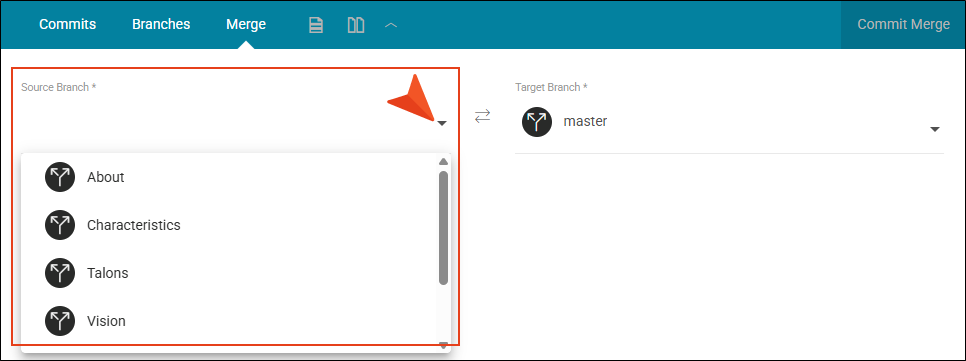
From the Source Branch drop-down, select the branch you want to merge into the Target Branch.
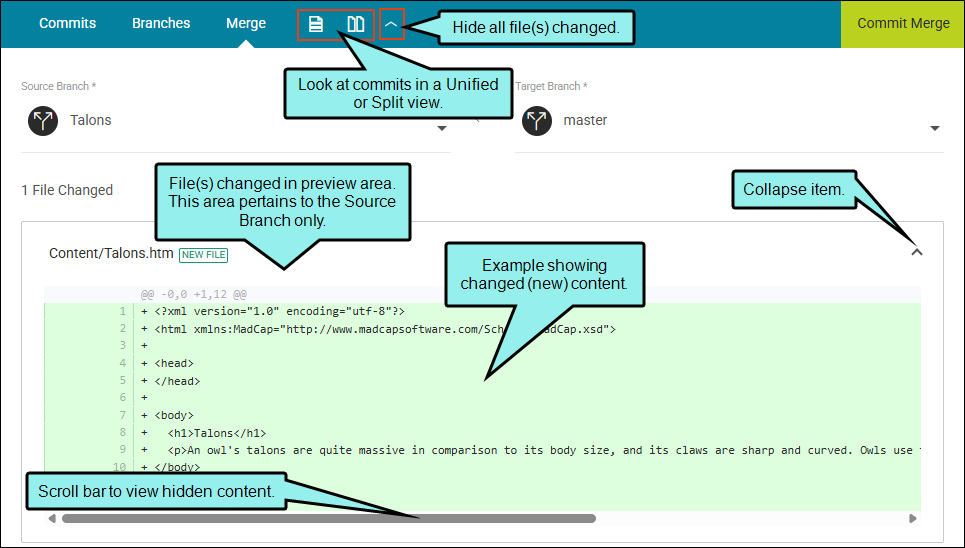
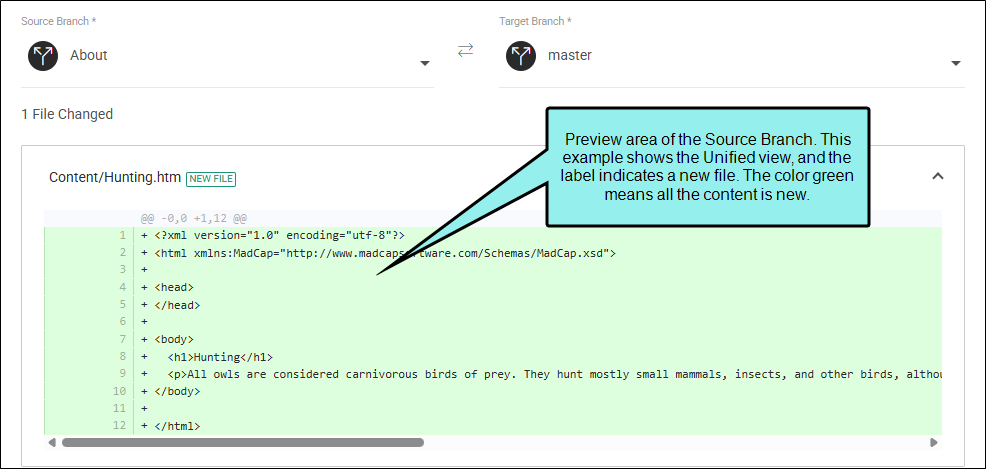
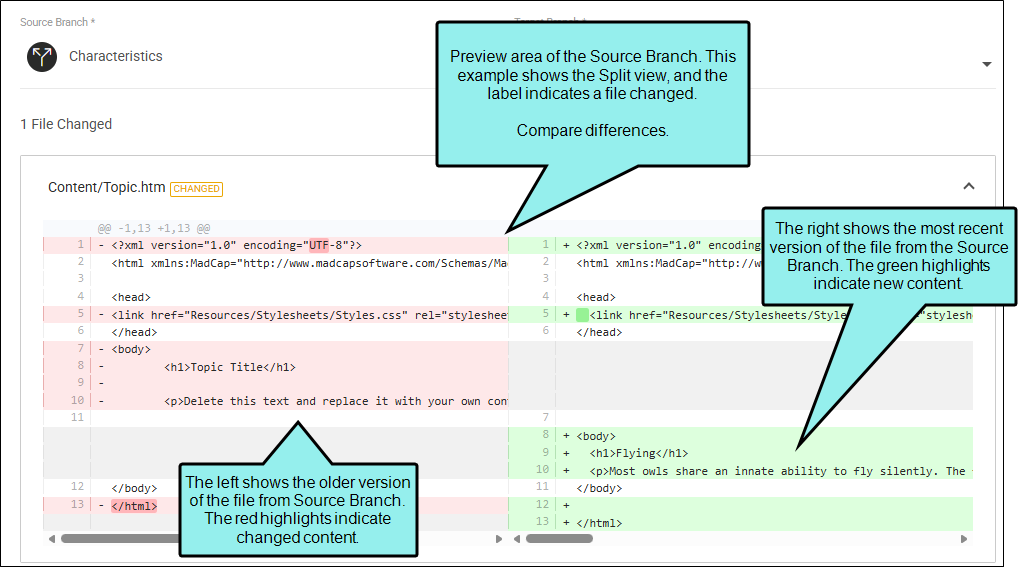
The Source Branch will most likely have file changes that are not in the Target Branch. If changes are detected, the associated commits display in the Merge page. Use the preview area to see color-coded file differences for previous and new versions of the Source Branch file, and for identifying the type of change (e.g., new file, changed, and deleted). The file "diff" shows changes that are in the Source Branch only, and not the Target Branch.
By default, the file(s) changed are expanded in the preview area. You can click the arrow to the right of each item to collapse it (or, collapse all of them from the Merge page toolbar by selecting Hide all diffs). There is a scroll bar at the bottom of each item to view any "hidden" content. Also, the toolbar includes buttons for view preference, click Unified view or Split view.
Note All file changes will be merged into the Target Branch. For example, if there are five changes listed, you cannot choose to merge only three.
-
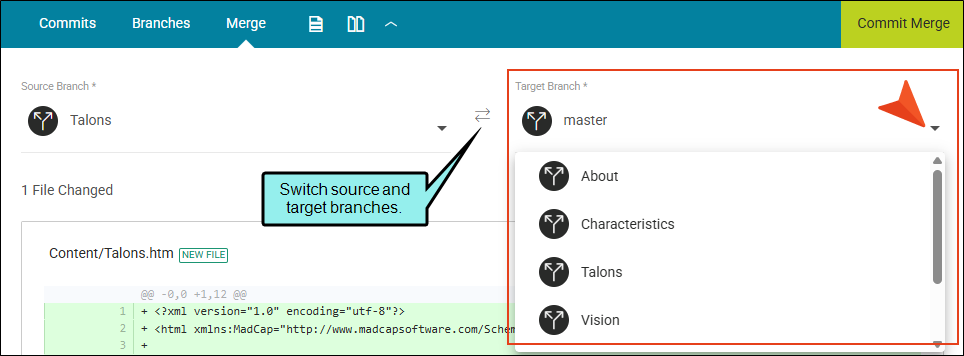
From the Target Branch drop-down, verify the branch to merge the Source Branch into or select a new Target Branch. By default, the master branch is set.
-
In the upper-right corner of the page, click Commit Merge.
-
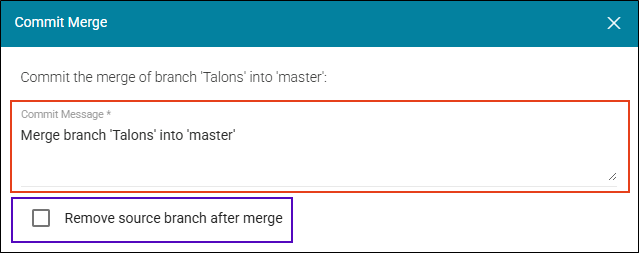
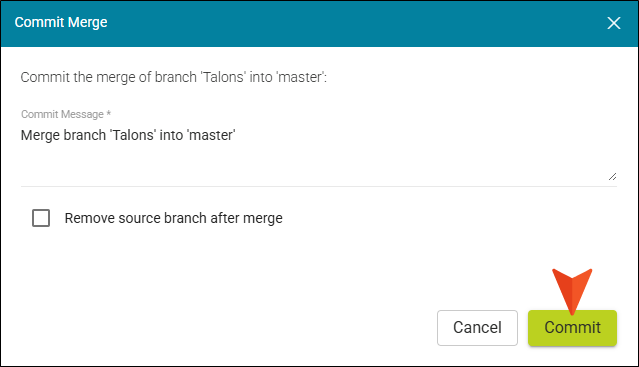
In the Commit Merge dialog, enter a Commit Message or verify the existing one. This provides a comment for the merge, tracks changes, and gives context to the commit.
In addition, you can select Remove source branch after merge to delete the Source Branch from the repository. This action cannot be undone, so only do this if you no longer need to use the Source Branch once it is merged into another branch. If you decide not to remove a Source Branch, keep in mind that it still lives in your repository and you might have to delete unwanted branches later.
-
Select Commit to start the merge process. (Or click Cancel to back out of the process).
When complete, a message displays with the results:
-
Success The Commit Merge dialog closes and the Merge page opens with a temporary banner indicating a successful merge at the bottom of it.
-
Fail An error message displays in the dialog that reads: Branch cannot be merged due to conflicts. Please resolve them in Flare Desktop. Select Cancel.
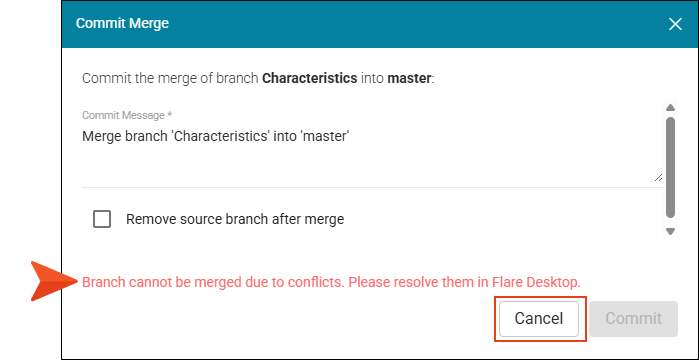
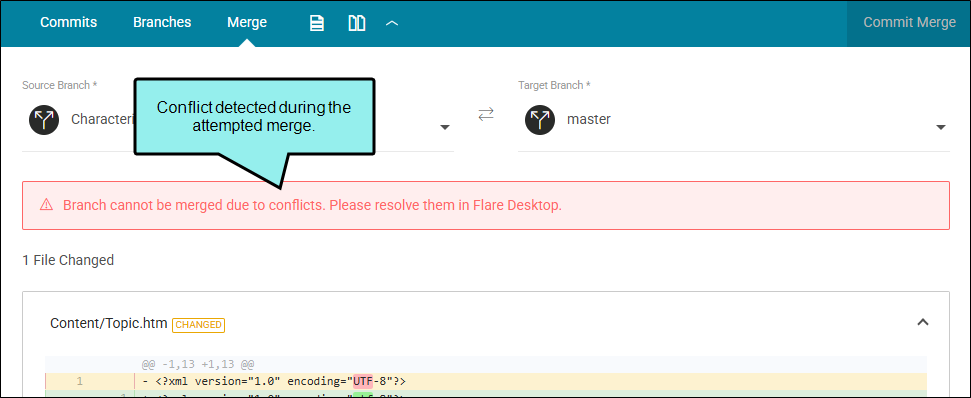
The Merge page opens with a conflict error message. The conflict banner will persist until the branch is merged or updated to remove the conflicts.
-
Note A conflict can occur when the same file has been edited in different branches (e.g., the Source Branch and Target Branch), and you try to merge them together. You can only merge branches together that are clean common scenarios and conflict-free. If you attempt to merge branches that contain conflicts, you need to resolve those issues in Flare Desktop. See the Flare Desktop Help system.
What’s Noteworthy?
Note Flare Online stores files virtually in a Git-based system, and your project branches are in the GitLab repository. When you merge branches only content that is committed to the repository is reflected in the merge. If pending edits are in the workspace, they are not in the repository. In other words, any outstanding non-committed edits from the workspace will not be a part of a merge until they are committed back to into the repository.
Note It is worth noting that Flare Online is the remote repository. Because of this, you do not need to "Publish" the branch, as you would do if working with a local branch from your desktop computer to a remote repository. However, if you have a branch in Flare Online but want to work with it using Flare Desktop, you would need to sync up the branch in Flare Desktop.
Example Conflict-free Merge
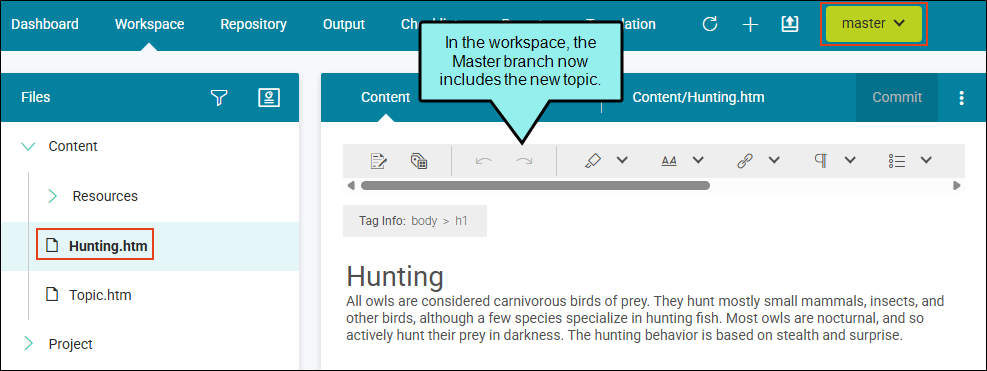
Owen has a Flare Online project called Owls. He creates a branch named About with a new topic in it called Hunting.htm. He wants to merge his newly committed topic from the About branch into the project's master branch.
In the Merge page Owen selects the Source Branch and Target Branch, and previews 1 file changed (i.e., the new topic). The label says "new file" and the green color indicates new content in the file.
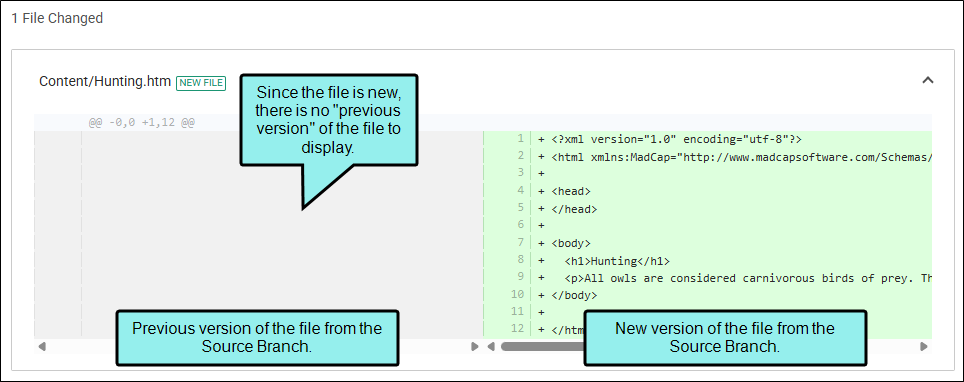
If Owen switches to the Split view, only the new version side of the preview area is populated because there is no previous version for a new file.
Owen commits the merge of the branch which starts the merge process. After the merge ends successfully, the grid and a Branch Merged banner displays. Since no updates were made to the master branch no conflicts were detected.
Example Conflicts in a Merge
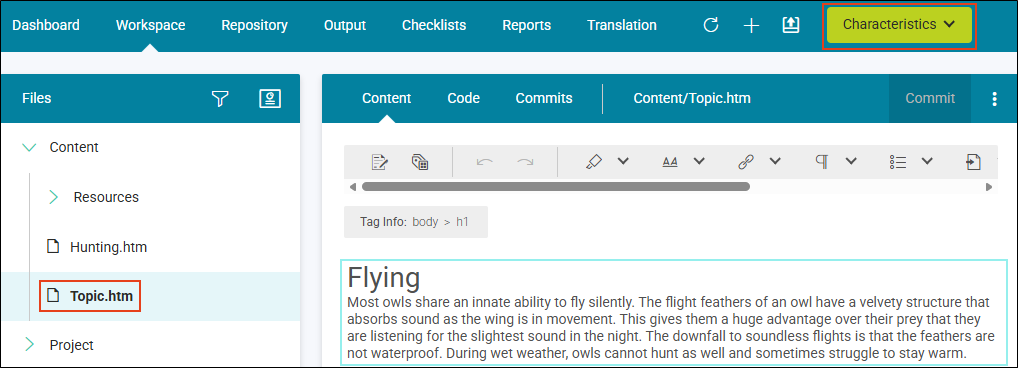
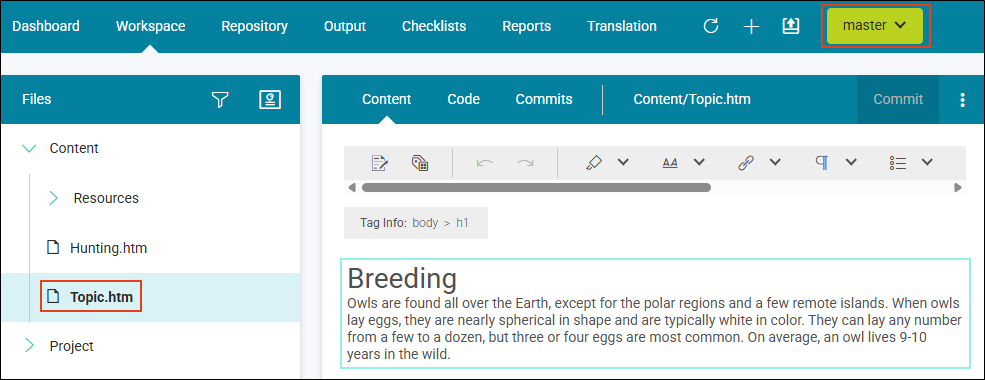
Otto is working in the Flare Online Owls project, and has created a new branch called Characteristics (based on the master branch). Otto edits Topic.htm with content about how owls fly and commits the topic to the repository.
Meanwhile, Owen opens Topic.htm using the master branch, and adds content about the breeding habits of the bird. He commits his changes to the repository.
Otto decides to merge the Characteristics branch into the master branch. In the Merge page, he previews 1 file changed in Split view.
Otto commits the merge of the branch which starts the merge process. The merge fails and displays with an error message in the Commit dialog and the Merge page. You must use Flare Desktop to resolve the conflict issues.
This merge detected conflicts because both the Source Branch (Characteristics) and Target Branch (master) had the same topic edited.
Example If you are managing branches between Flare Online and Flare Desktop, the following describes how to Pull a branch down to the desktop. (A merge operation is not required.)
-
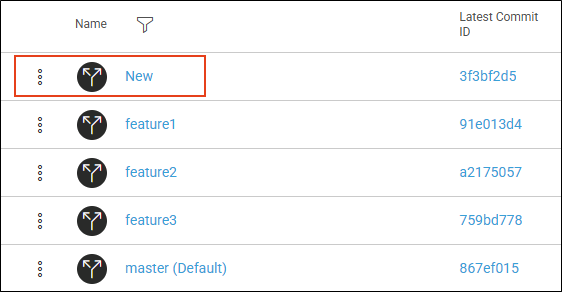
Create a branch in Flare Online, based on a master branch. (In this example it is called New.)
-
Change a file in the new branch, and commit it.
-
Open Flare Desktop with the corresponding project and license.
-
In Source Control, perform a Pull to download all the project files to the local database.
-
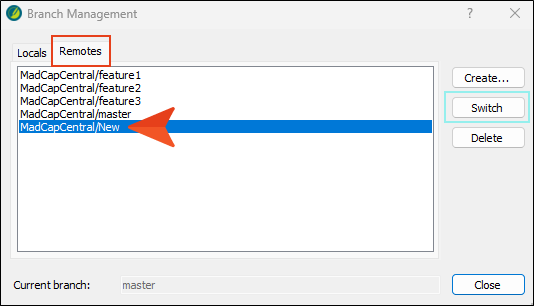
Open the Branch Management dialog. Notice the Locals tab does not show the New branch, but the Remotes tab does.

-
In the Remotes tab, select the branch from Flare Online, and click Switch.
-
The branch displays in your Source Control Explorer as the current or active branch.
-
The changed content displays in the topic editor.
Example The following steps outline what to expect if you are publishing a branch from Flare Desktop to use in Flare Online. See the Flare Desktop Help system.
-
Create a branch in Flare Desktop, based on a master branch.
-
Publish the branch to Flare Online (i.e., MadCapCentral).
-
(Optional) Switch to the new branch, make a change, and commit the file.
-
Open Flare Online with the corresponding project and license.
-
Navigate to Projects > Repository > Branches. (If you are already at that page, click the Refresh button to see new data.)
-
The new branch displays in the grid, and the project activity updates.

