Creating Variables


You can create a new variable within a variable set. A variable can be a Text type or a Date/Time type.
[Menu Proxy — Headings — Online — Depth3 ]
Permission Required?
Editing content and project files is an activity available to users with the Author status. By default, users with Author status have the following permissions set:
-

If this is deselected, then viewing files in a read-only mode is allowed. On the left side of the page, the Files vertical three-dot menu is not available.
-

If this is deselected, the XHTML in the Code view is read-only.
Editing code is regarded as a capability for an advanced user. If not done properly, the code can become malformed quickly. Administrators can prevent users from editing the code by deselecting the Edit Code permission.
For more information about permissions, see Setting User Permissions or Setting Team Permissions.
How to Create a Text Variable
-
Open a project, and select the Files tab at the top.
-
From the left side of the page, with All Files showing, navigate to and select a variable file.
Tip Click the All Files drop down, and select Variable Sets. This filters only the variable files to display in the files panel.

-
In the Variables Editor, click Edit.
-
In the local toolbar, select
 .
. -
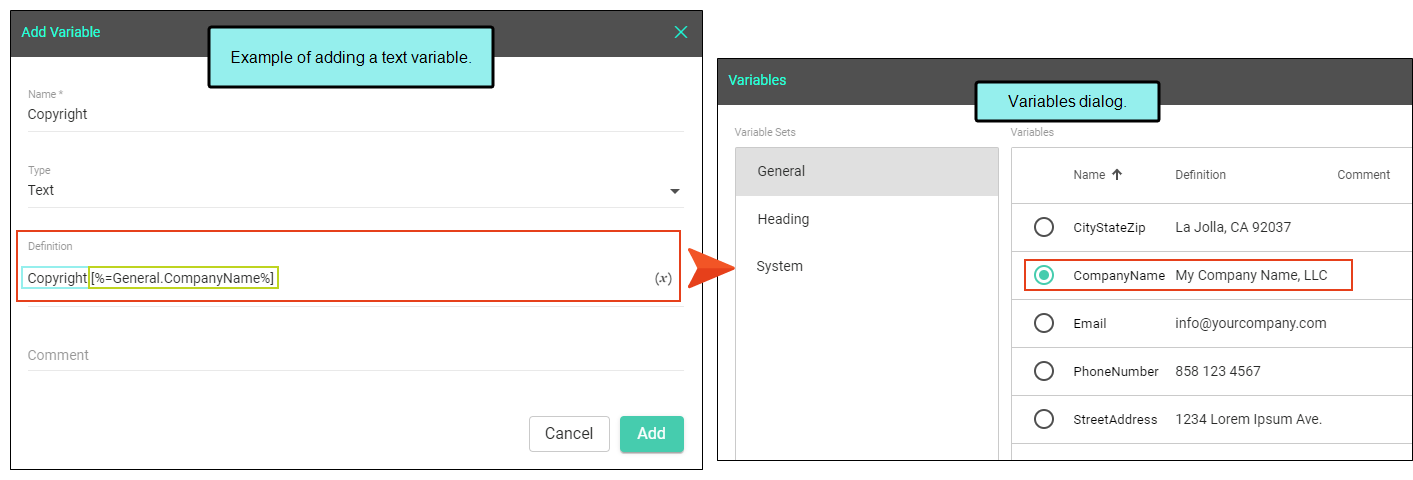
In the Add Variable dialog, populate the fields.
-
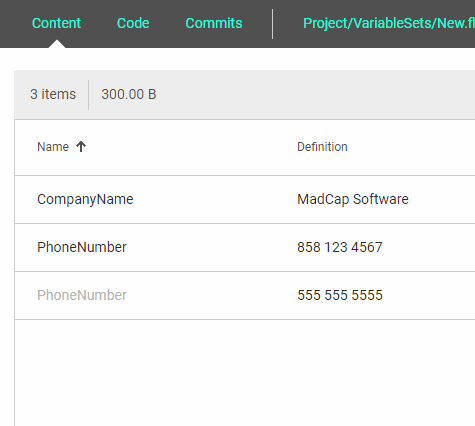
Name Enter a unique name.
-
Type From the drop-down, select Text.
-
Definition Enter a definition for the new variable. If you want to insert another variable as part of the definition, click
 . The variable displays as syntax, but in the output the variable definition is shown.
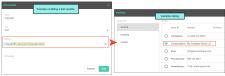
-
Comment (Optional) Enter a comment to associate with the variable.
-
-
Click Add.
-
Click Commit. (Or click Cancel, to back out of the process.)
-
In the Create New Commit dialog, enter a Commit Message.
-
Click Commit.

If the animation below is cut off, you can see the complete animation by clicking the link under it to open the full topic.
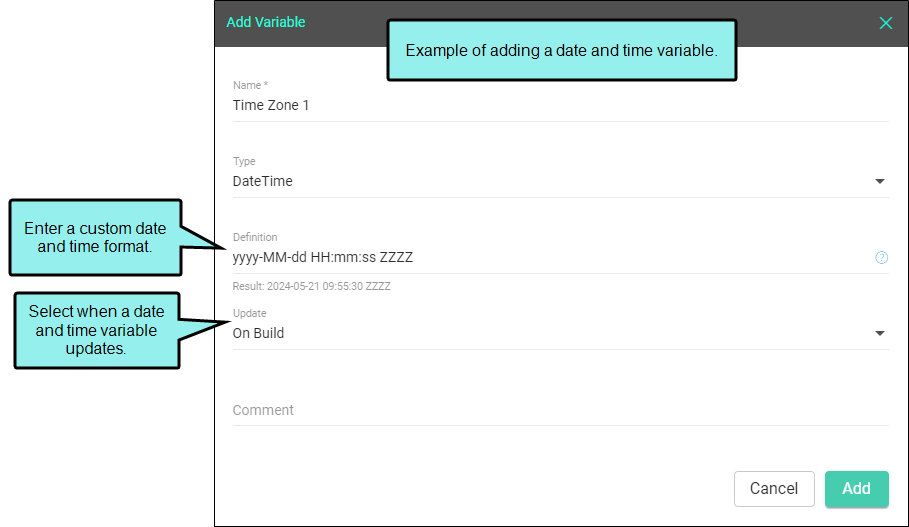
How to Create a Date/Time Variable
-
Open a project, and select the Files tab at the top.
-
From the left side of the page, with All Files showing, navigate to and select a variable file.
Tip Click the All Files drop down, and select Variable Sets. This filters only the variable files to display in the files panel.
-
In the Variables Editor, click Edit.
-
In the local toolbar, select
. -
In the Add Variable dialog, populate the fields.
-
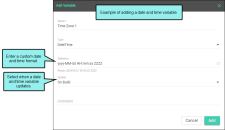
Name Enter a unique name.
-
Type From the drop-down, select DateTime.
-
Definition For a date and time definition, enter a combination of format specifiers.
Specifiers are based on Microsoft's custom date and time format strings. For details of the specifiers available, see:
Copyhttp://msdn.microsoft.com/en-us/library/8kb3ddd4.aspxHere are some of the more common specifier combinations:
Specifier Combination
Result
MMMM dd, yyyy hh:mm:ss tt
July 09, 2013 03:55:53 PM
hh:mm:ss tt dd MMMM, yyyy
03:55:53 PM 09 July, 2013
dddd MMMM dd, yyyy
Tuesday July 09, 2013
ddd MM/dd/yy
Tue 07/09/13
-
Update From the drop-down select how you want the variable to display the date and time.
-
Manually The variable displays the date and time when the variable was created. You can update the variable manually, and it will display the date and time when it was most recently updated.
-
On File Creation The variable displays the date and time that you created the file.
-
On File Save The variable displays the date and time that you last saved the file.
-
On Project Save The variable displays the date and time that you last saved all the files in the project.
-
On Build The variable displays the date and time of the most recent project build. This is the default Date/Time variable type.
-
-
Comment (Optional) Enter a comment to associate with the variable.
-
-
Click Add.
-
Click Commit. (Or click Cancel, to back out of the process.)
-
In the Create New Commit dialog, enter a Commit Message.
-
Click Commit.
What’s Next?
Now you can insert variables into your project. See Inserting Variables.

