Renaming Targets
When you create a new project using a template, one or more new targets are added to your project. It is often helpful to rename the targets that you use to reflect the nature of your project (especially if you are using multiple targets with the same output type).
[Menu Proxy — Headings — Online — Depth3 ]
Permission Required?
Editing content and project files is an activity available to users with the Author status. By default, users with Author status have the following permissions set:
-

If this is deselected, then viewing files in a read-only mode is allowed. On the left side of the page, the Files vertical three-dot menu is not available.
-

If this is deselected, the XHTML in the Code view is read-only.
Editing code is regarded as a capability for an advanced user. If not done properly, the code can become malformed quickly. Administrators can prevent users from editing the code by deselecting the Edit Code permission.
For more information about permissions, see Setting User Permissions or Setting Team Permissions.
How to Rename a Target
-
Open a project, and select the Files tab at the top.
-
From the left side of the page, click the All Files drop-down, and select Targets.
-
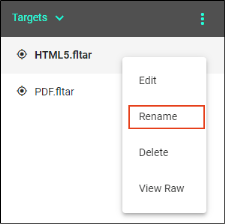
Right-click the target file you want to rename, and from the menu select Rename.
-
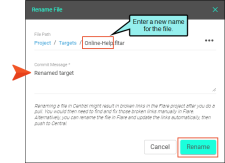
In the Rename File dialog, enter a new name for the file, enter a Commit Message, and select Rename.
What’s Next?
You can edit settings in the target. See Editing Target Settings.


