Editing Checklists
After creating a checklist, you can edit it to make changes or additions.
[Menu Proxy — Headings — Online — Depth3 ]
Permission Required?
To create, edit, or delete checklists or checklist templates, you must have the following permission setting:

Note Users associated to the project without the permission can mark items on the checklist (i.e., changing statuses) and can click to add a note for a particular row.
How to Edit a Checklist
- Select Projects on the left side of the interface, then click a project name to open it.
- At the top of the interface, click Checklists.
- On the left side of the page, select the checklist you want to edit. The checklist grid and chart are displayed to the right.
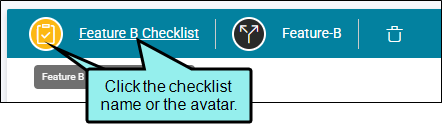
-
On the toolbar click the name of the checklist or the checklist avatar. The Checklist profile dialog opens where you can see the overview, settings, activity, etc.
- From the left, click Settings to change the name, type, branch, or description of the checklist.
- From the left, click Columns or Rows to make changes to the checklist. For more details about each option, see Creating Checklists.
- (Optional) From the left, you can click Save as Template, which will make the checklist content available when you create other checklists in the future. See Creating Checklist Templates.
- When you are finished, click Save.

