Editing TOCs


When you click to edit in the TOC Editor, it enters a “workspace mode,” essentially making a working copy of the file from the repository. In this mode, the file is in a non-committed state with pending changes. When editing is completed, the file needs to be committed back to the project’s repository.
[Menu Proxy — Headings — Online — Depth3 ]
Permission Required?
Editing content and project files is an activity available to users with the Author status. By default, users with Author status have the following permissions set:
-

If this is deselected, then viewing files in a read-only mode is allowed. On the left side of the page, the Files vertical three-dot menu is not available.
-

If this is deselected, the XHTML in the Code view is read-only.
Editing code is regarded as a capability for an advanced user. If not done properly, the code can become malformed quickly. Administrators can prevent users from editing the code by deselecting the Edit Code permission.
For more information about permissions, see Setting User Permissions or Setting Team Permissions.
How to Edit a TOC
- Open a project, and select the Workspace tab at the top.
-
From the left side of the page, expand the existing folders to navigate to a file. You can also click
 to search for a specific file.
Tip Click the Open Filters button, and select from the File Type drop-down TOCs. This filters only the TOC files to display in the files panel.
Tip From the left side of the page, if you right-click the TOC, you can open it from the popup. From this menu, you can also do other tasks.
-
Select a TOC file. It displays to the right in the TOC Editor.
-
(Optional) From the local toolbar, select
 . You might do this to easily select more than one TOC node to apply conditions to, move multiple items, or to remove several entries at once.
 -
(Optional) From the local toolbar, you can expand or collapse the TOC nodes by clicking
 or
or  .
. -
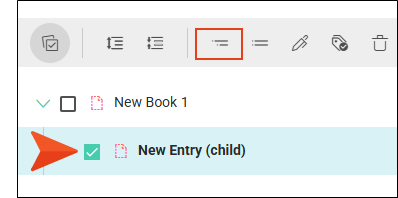
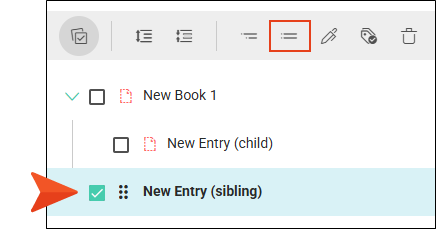
Hover over the TOC node, and select from its context menu to the right an editing option. (If TOC nodes are selected, you can select from the local toolbar.)
-
Insert child item Inserts an item below the selected (parent) entry.
-
Add sibling item Adds an item below the selected entry.
-
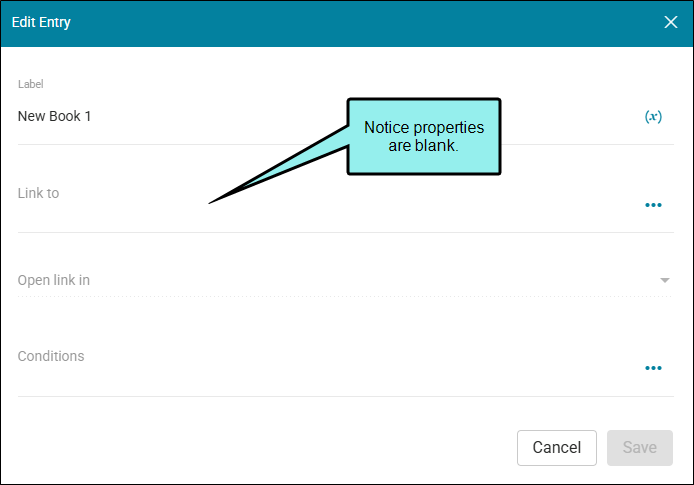
Properties Opens a dialog to edit the TOC node. You can update the label, override the file path link, indicate how it opens in a browser, or apply conditions.
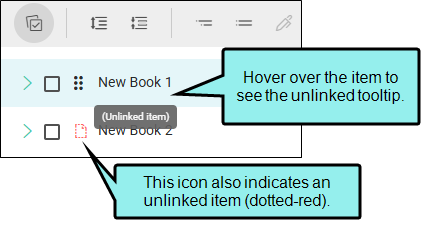
Example You have a new TOC with placeholder items in it that are "unlinked."
Select to edit the properties.
Populate and save the desired fields: Label, Link to, Open link in, Conditions.
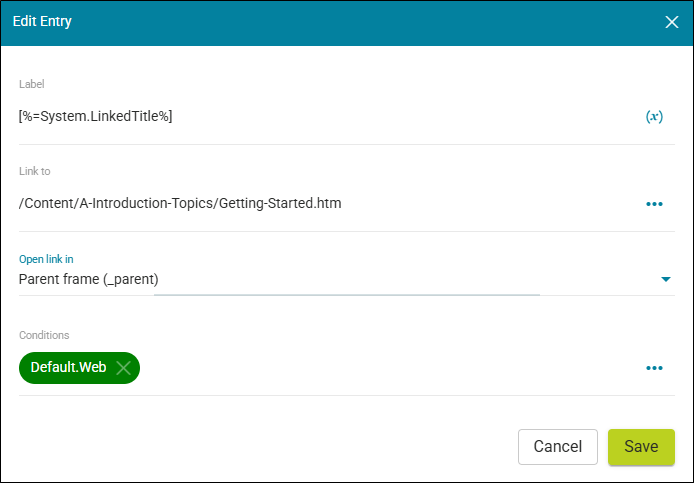
The top TOC entry is now linked to a file in your project. The variable selected in the Label field ensures that the title (often the first heading found in the topic) is automatically used as text for that TOC entry.
-
Apply Conditions Opens a dialog that lets you apply conditions to content.
Note You can apply condition tags to specific entries in your TOC. This lets you keep some TOC entries from being published in the output if you do not want to have the entire TOC built.
-
Delete Deletes the selected TOC entry or entries (if multiple are selected).
-
-
(Optional) You can rearrange your TOC entries. Do one of the following:
-
In the editor, click
 to drag and drop a node to another location in the TOC.
 -
Select a TOC entry (or entries), and from the local toolbar use the arrow buttons to move the node(s).
-
-
In the upper-right corner of the editor, click Commit.
-
In the Create New Commit dialog, enter a Commit Message.
-
Click Commit. (Or click Cancel, to back out of the process.)
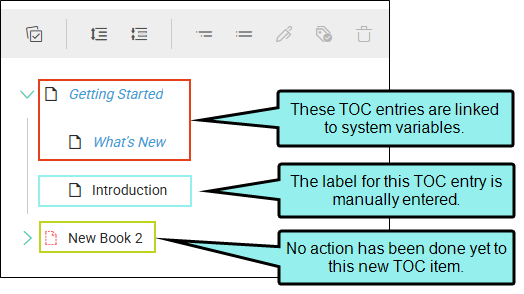
Blue vs. Black Text
When working on a TOC, you might notice text colored blue or black. This does not mean that the text will show up as blue or black in the output.
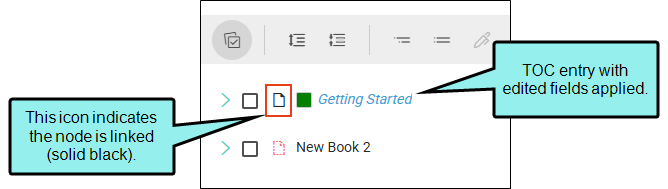
If the text is blue it means that the TOC entry contains a system variable
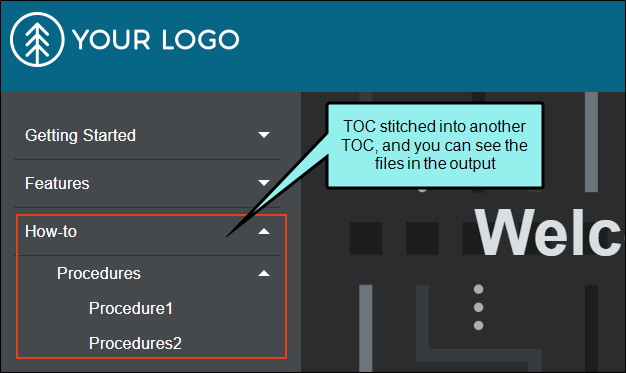
Stitching TOCs Together
You can merge or "stitch" multiple TOCs from the same project into one TOC for the output.
Example You have a main online TOC established, but you also have another smaller TOC that only includes topics with how-to procedures in them. You want to include this smaller TOC with your output. Here's one way to do that.
Select the location in your main TOC to insert the other smaller TOC.
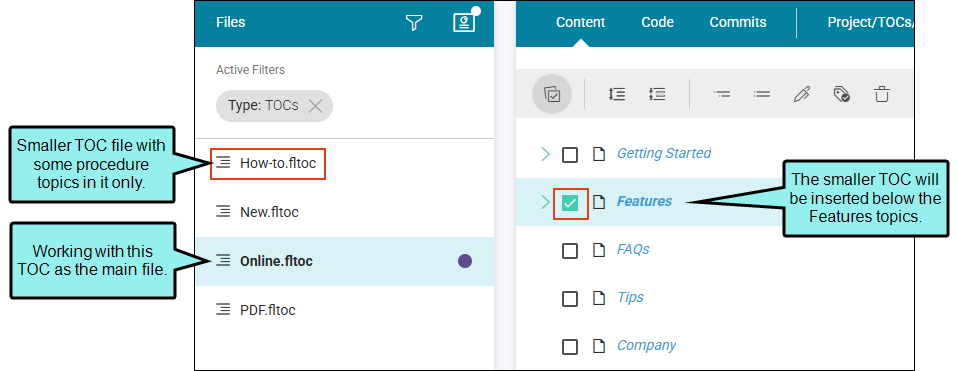
You click to add a sibling item, and link it to the smaller "How-to" TOC from the same project.
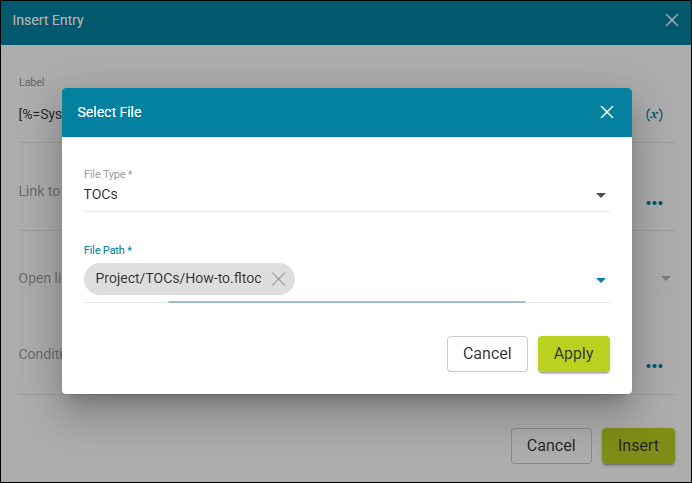
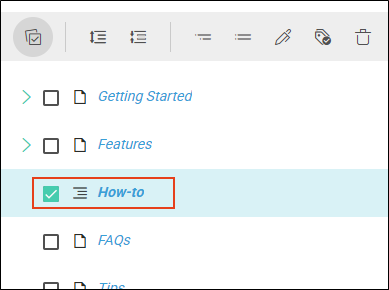
The TOC is inserted into your main TOC. At this time, you cannot open linked items from the TOC Editor.
When you build the project with the associated main TOC, the output displays with the smaller TOC stitched in.